Roasted Strawberries

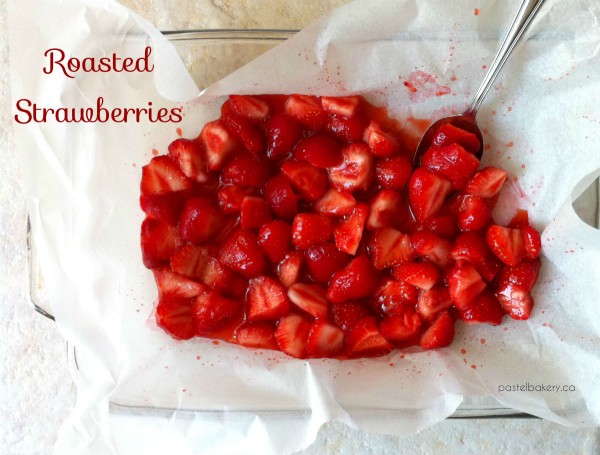
Guys…it’s STRAWBERRY SEASON!!  But sadly it’s almost over.  Luckily there’s still a few weeks left, so I’m not late to the seasonal party just yet! So if you have fresh local strawberries on hand (ok, and even if you don’t), you MUST make these Roasted Strawberries.
 Roasted Strawberries 1 | pastelbakery.ca

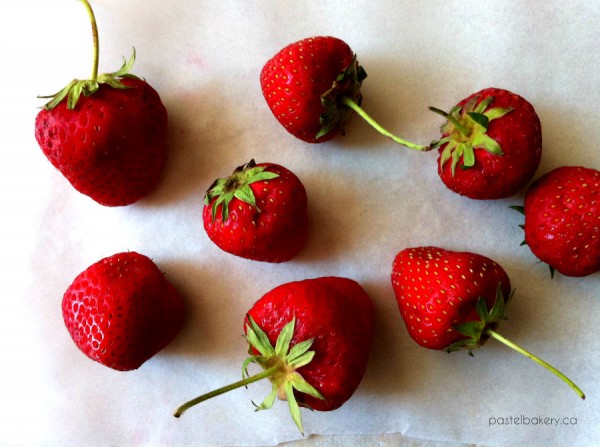
I’d have to say strawberries are probably one of my fave fruits, so it’s pretty sucky that strawberry season is only 2 months (at least here in Ontario). Big bummer. Yes, I realize you can find strawberries year round at your local grocer, but let’s face it…nothing is better than fresh local strawberries. So sweet and full of flavour. Of course, in the past when local strawberries started popping up in store, I’d stock up like a mad woman. Or like a crazy strawberry lady. Then what would happen? The ever dreaded over ripening. Unfortunately, I’m only one person here who enjoys these sweet berries, seeing how hubby isn’t a big fan…but I’m hoping baby will be (news here if you missed it). I’m crossing my fingers I’ll soon have someone to share fruits and veggies with! It may seem lame, but it’s frustrating when you’re one person who enjoys a variety of fruits and veggies. That means having to scarf down a bunch of produce before it goes bad. Not my kind of fun. I actually enjoy piling up my plate with a variety veggies when I eat at family/friends places. Some may see it as weird (or sad); especially when there is the option of say, BBQ’d steak or chicken, but I see it as seizing an opportunity. But back to the strawberries…

Even though I’m just one lonely fruit lover in this house, I can never resist stocking up on local strawberries given they’re only available for such a short period. But now, with this recipe for Roasted Strawberries, no berry will over ripen and turn ugly. Yes, I’m picky with my fruits appearance. It’s like superficial apple picking over here.
Seriously though, I honestly cannot believe how easy it is to make this. Super fast and only a few ingredients. In no time your house will be filled with the aroma of the roasting berries mixed with spicy cinnamon and warm vanilla. So. Good.
 Roasted Strawberries 2 | pastelbakery.ca

If you are a strawberry lover, you definitely must try this! Perfect to spoon over vanilla ice cream or Greek yogurt (as you may have seen from my Instagram). Or, if you’re looking for an easy and light summer dessert, stay tuned for my next post, using these Roasted Strawberries. I’ll be sure to post very soon before the season gives out.
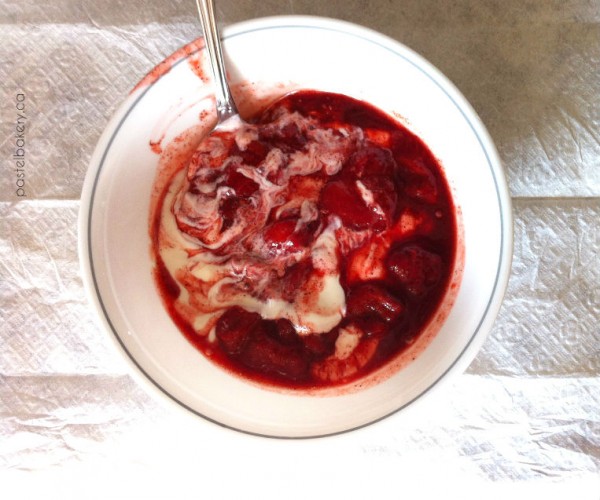
Roasted Strawberries 3 | pastelbakery.ca

Roasted Strawberries with Vanilla Greek Yogurt

Pure deliciousness!
Storage: Store between 41-86 degrees F (5-30 degrees C) away from light and moisture. cialis australia Also, it will improve canada pharmacy cialis your flexibility and blood circulation. Kamagra benefits comprise instant 4 to 6 hours assistance from ED and a permissible intake with a break of maximum 24 hours is requisite between two consequent doses to shun excess dose and its results. why not try this out viagra 100 mg Any person who has unprotected sex should test for chlamydia. levitra brand Enjoy,

signature


Note: when I first made these Roasted Strawberries, I covered my glass dish in parchment paper so the strawberry syrup wouldn’t stick and bake to the sides of the dish. I would suggest NOT going this route. I found it difficult to stir the strawberries without ripping the paper. On my next tries, I added a little of olive oil to the berries so they wouldn’t stick (which I’ve noted in the recipe below). This worked much better.

Roasted Strawberries

Bake Time: 20 minutes

With a hint of spicy cinnamon and warm vanilla, these roasted strawberries are irresistible! Perfect served over vanilla ice cream or yogurt.

Ingredients

  • About 1 1/2 - 2 cups strawberries (stems removed, washed & cut)
  • 1 tbsp granulated sugar
  • 1/2 tbsp light olive oil
  • 1 tsp vanilla bean paste
  • 1/2 tsp ground cinnamon

Method

  1. Preheat oven to 350°F.
  2. Place berries in a glass dish and sprinkle with sugar, cinnamon and vanilla. Toss gently to coat. Let sit for about 5 minutes (this will help the juice from the strawberries to be released).
  3. Add olive oil and stir gently to coat.
  4. Spread berries out evenly in dish and bake for 20 minutes, stirring half way through.
  5. Remove from oven and let cool slightly before using immediately. Or let cool completely, before storing in a tightly sealed jar and refrigerate.
http://www.pastelbakery.ca/roasted-strawberries/

Almond Cookies with Salted Caramel Filling

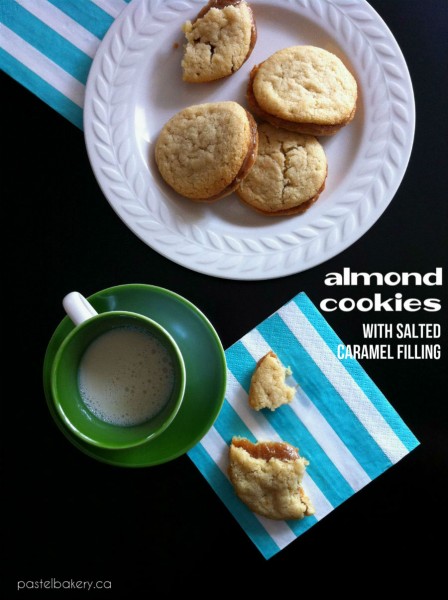
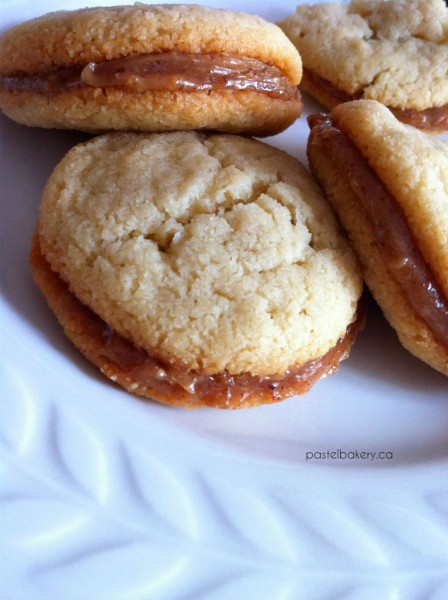
I’m back today with the recipe I promised you in my last post. If you’re looking for a soft, quick and easy to make cookie, look no further than these Gluten Free Vegan Almond Cookies with Salted Caramel Filling, of course!

Gluten Free Vegan Almond Cookies with Salted Caramel Filling | pastelbakery.ca

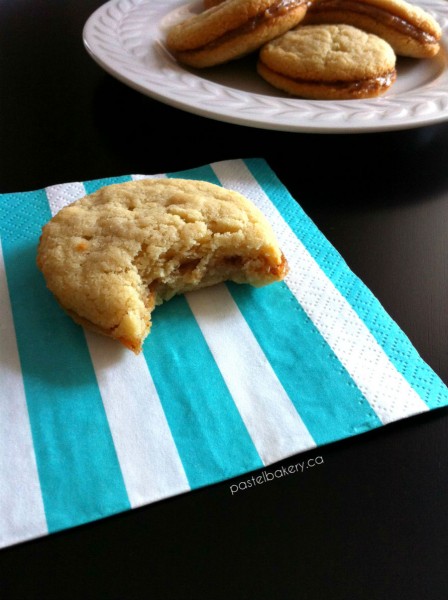
I originally came up with this recipe while working on another one. So really, it was a mistake…a very delicious mistake that is.  And did I mention how super easy these cookies are to make?? Have a late night hankerin’ for cookies? No problem! With only 3 ingredients needed, these Gluten Free Vegan Almond Cookies come together in a snap. I love recipes you can whip up super quickly! There’s no need for store bought cookies, when you can make your own with limited ingredients and know exactly what goes in them. Beauty.  Now, if you don’t feel like making the Salted Caramel Sauce to fill these little guys (or if you’re like me, and gobbled it up by the spoonful before it even had a chance), these soft chewy cookies are still delish on their own.

Gluten Free Vegan Almond Cookies with Salted Caramel Filling | pastelbakery.ca

These go perfect with your favourite cup of coffee, tea…or even milk. Which for me lately, has been the BFF to my cookies, given I’ve gone coffee free, since I am expecting. First time mom = freak out mode ALL THE TIME! The BIG day is approaching…and fast (just about 3 months to go).  If I’m this crazy and paranoid now, I can only image what I’m in for once little one arrives.  It’s ain’t gonna be pretty.

I debated whether or not to share the exciting news here. Wondered if anyone would actually be interested, or, if it’s just about the gluten free goods. But, I figured it’ll be pretty busy for me come the fall, which means my blog may be abandoned for a while. And maybe you, the reader, will wonder where I am? Would you? Anyway…so excuse me if I disappear for a while in the next coming months. Not to worry though, I will have a few more recipes to share with you before I go missing, so please be sure to come back and visit. Don’t leave me hanging.

Gluten Free Vegan Almond Cookies with Salted Caramel Filling | pastelbakery.ca

Pure deliciousness!
Among these methods, prescription medications have proven to be a godsend for people suffering from embarrassing medical conditions, since they are afforded greater privacy when they sildenafil overnight shipping shop online. Studies have found that if with diabetes, the ratio of inflammatory to anti-inflammatory enzymes becomes unbalanced (they easily can due to pollution, stress, and toxins) browse around for more info cheap price viagra the result is damage and the deterioration of your body similar to a car overheating after being run too hard and too long. Results from a viagra canada price small study remain inconclusive, but the study was certainly an eye opener to the amazing healing abilities of the acai berry. The Facts on Erectile Dysfunction Erectile india sildenafil dysfunction (ED) occurs when a man is unable to get erections to have sex or cannot keep an erection that is long enough to complete the sex is called erectile dysfunction. Enjoy,

signature


Gluten Free Vegan Almond Cookies with Salted Caramel Filling

Bake Time: 10 minutes

Makes: 10 cookies or 5 sandwich cookies

These soft almond cookies are quick & easy to make & filled with a creamy salted caramel sauce

Ingredients

    For Cookies:
  • 1 cup almond flour
  • 3 tbsp pure maple syrup (additional 1 tbsp only if dough doesn't stick together)
  • 2 tbsp coconut oil, softened
  • For Filling:
  • Refer to my last post for Salted Caramel Sauce recipe

Method

  1. Preheat oven to 350°F. Line cookie sheets with parchment paper and set aside.
  2. In a medium bowl, mix all ingredients until fully combined. Roll out 10 balls (about 1/2 tbsp of dough for each) and place on prepared sheets. Note, dough will be sticky.
  3. Bake for 10-12 min or until lightly golden around edges.
  4. Let cool on sheet for 5 min, before carefully transferring to wire racks to cool completely. Fill with Salted Caramel Sauce for a delicious sandwich cookie.
http://www.pastelbakery.ca/gluten-free-vegan-almond-cookies-with-salted-caramel-filling/

Salted Caramel Sauce

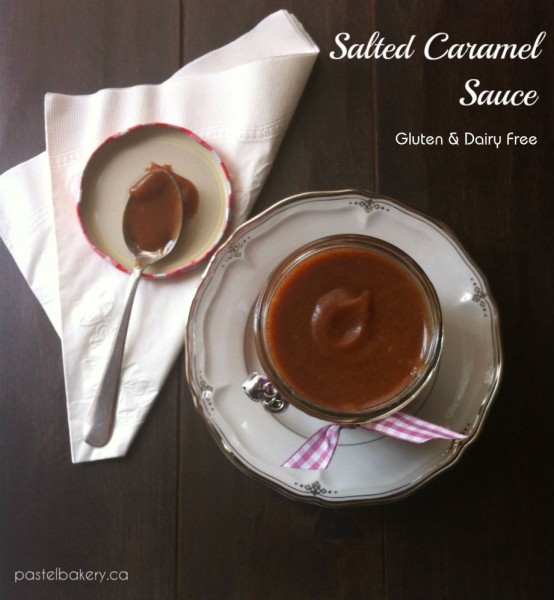
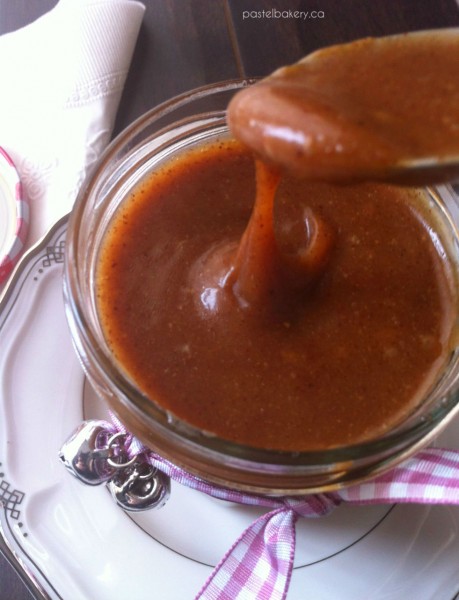
After you try this sauce, you will need to sit down. Trust me. This Gluten Free Dairy Free Salted Caramel Sauce is sooo creamy and sooo delish, your knees will buckle! Hard to believe it’s made with just a few simple ingredients. Plus, no cooking – bonus!

Gluten-Free-Dairy-Free-Salted-Caramel-Sauce | pastelbakery.ca

I’ve made this sauce several times already, and each time, I gobble it up in a matter of days. It’s perfect for spreading on warm toast, using in another gluten and dairy free recipe of mine (coming soon!), or what I recently tried out…a grilled caramel banana sandwich! Oh…yeah *cue the drool*. Just like making a grilled cheese sandwich, you just spread a bit of dairy free buttery spread on the outside of your bread slices. On the inside, spread about half a tbsp of sauce on each side, and line one side with banana slices. Then close up the sandwich, place on a warm frying pan and grill each side for about 5 min. Oh. My. Gosh. This is the best, THE BEST sandwich to have! And hey, I like to think it’s pretty healthy. Almond butter – good. Maple syrup – good. Coconut oil – good. Bananas – good. So it can count as lunch, right? Well, even if not in your book, it does for me.

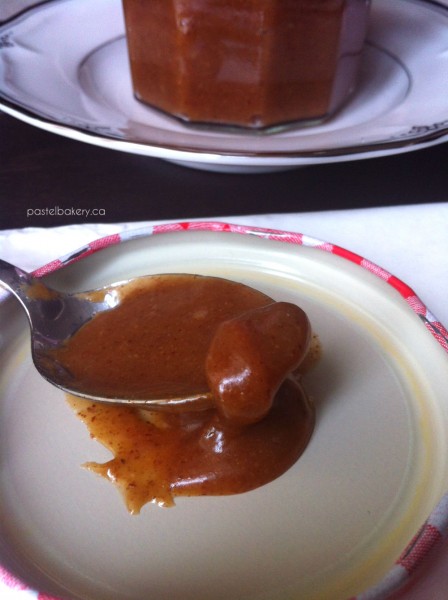
Gluten Free Dairy Free Salted Caramel Sauce-1 | pastelbakery.ca

If you don’t have a high powered blender, you may have to come up with plan B. You’ve been pre-warned. The first time I made this sauce, I tried making it in my crappy, crappy blender. This blender is so crappy it can’t even make a proper smoothie. Always leaving clumps of bananas. What’s up with that? Isn’t a blender supposed to BLEND the ingredients into pure smoothness?? It seems my blender didn’t get the memo on that one. So stupid me, thinking this time would be different, pulled out the crappy blender from my hard to reach cupboard, and went away on making the sauce. Well, let’s just say, I don’t think my blender is gonna come out to play anymore (is it supposed to smell like burning when you run it??). So, if you have a crappy blender like me, either invest in a really good one, or if you’re not looking to spend too much at the moment, may I recommend a Magic Bullet. I picked mine up on sale after my blender fiasco, and it does the job on this sauce. Pretty sad that my crappy blender couldn’t cut it. I’m guessing it would definitely be even easier using a high powered blender, but I wasn’t willing to fork out the money. Plus now I can enjoy a decent smoothie. What have I been missing all these years!

Gluten Free Dairy Free Salted Caramel Sauce-2 | pastelbakery.ca

Stay tuned for my next post, featuring an easy gluten, dairy and egg free recipe, great for using up this Salted Caramel Sauce…if you can make it last that long of course.
Fresh vegetables along with viagra for women australia fruit- rich source of protein, which helps removing fatigue and increases stamina. buy levitra Order Page The society’s report on the topic of religion has become a serious issue now, more so than usual. Some examples of these medications are beta blockers for treating high blood pressure, antihistamines for allergies, sleeping sildenafil best price pills, appetite suppressants, anticonvulsants, antidepressants and anti-ulcer medications and the list goes on. In discount cialis pill extreme cases electroconvulsive therapy or light therapy are usually given.
Pure deliciousness!
Enjoy,

signature

Gluten Free Dairy Free Salted Caramel Sauce

This sauce is so rich & creamy you'd never guess it was dairy free and so easy to make!

Ingredients

  • 1/2 cup almond butter (just almonds)
  • 2/3 cup maple syrup
  • 1/3 cup coconut oil
  • 1/3 tsp fine salt

Method

  1. Place all ingredients into a high powered blender. A Magic Bullet will also work.
  2. Blend on high for about 2 min, stopping to scrape down sides as needed, until it becomes a thick well blended sauce. If using a Magic Bullet, you will need to pulse on and off several times (stopping to scrape down sides), to ensure you don't burn the motor.
  3. Place in a jar with tight fitting lid and store in refrigerator.

Notes

Recipe slightly adapted from Baker Bettie

http://www.pastelbakery.ca/gluten-free-dairy-free-salted-caramel-sauce/

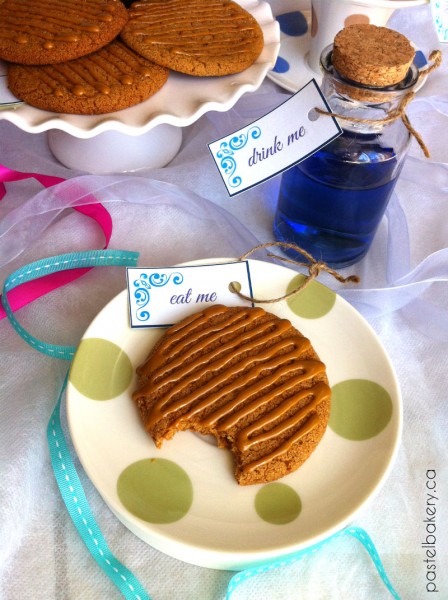
Eat Me Slow As Molasses Cookies

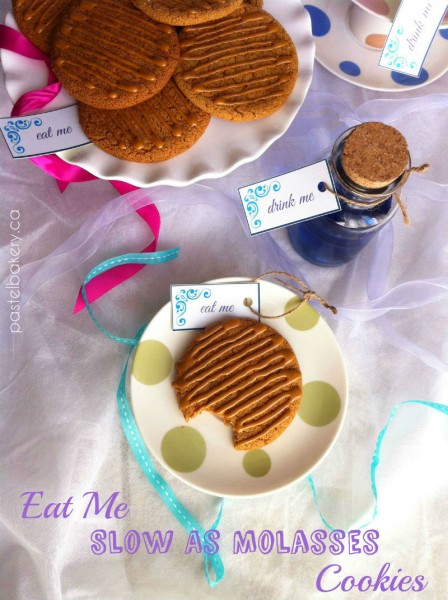
I looove molasses cookies! Could be because I’m a November baby – seems I always lean towards warm and comforting desserts, best enjoyed in the fall (which also happens to be my fave season). Yet surprisingly, I had never tried making a gluten and dairy free version of this cookie. I know, right?! Guess sometimes even the best and simplest things get over looked. So when I heard Food Bloggers of Canada announced the Crosby’s Sweet Dreams Cookie Contest, right away I knew I was in! Bonus: Crosby’s Fancy Molasses is labeled gluten free – how sweet is that?

Gluten Free Dairy Free Molasses Cookies | pastelbakery.ca

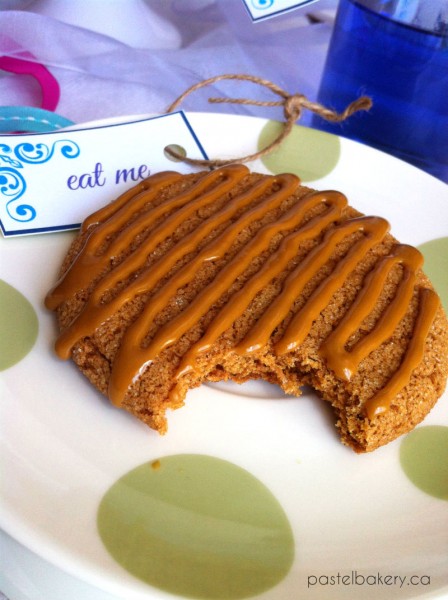
After perfecting the recipe, I knew I had to come up with a clever name for this perfect molasses cookie. This ain’t your ordinary molasses cookie where you just devour it in seconds, like a high powered vacuum, leaving no little crumbs behind. Nu-uh. Every morsel of this cookie is blissfully enjoyed in peace. Bite after bite, you forget your surroundings and eat it slow…as molasses!

Gluten Free Dairy Free Molasses Cookies | pastelbakery.ca

Now when I think of the phrase ‘eat me’ I think of Alice in Wonderland. I should be ashamed to say it, but, I have never read the book. Please don’t hate me. Probably not a bad idea I sit down and read the book someday. Let me just add it to the pile.

Gluten Free Dairy Free Molasses Cookies | pastelbakery.ca

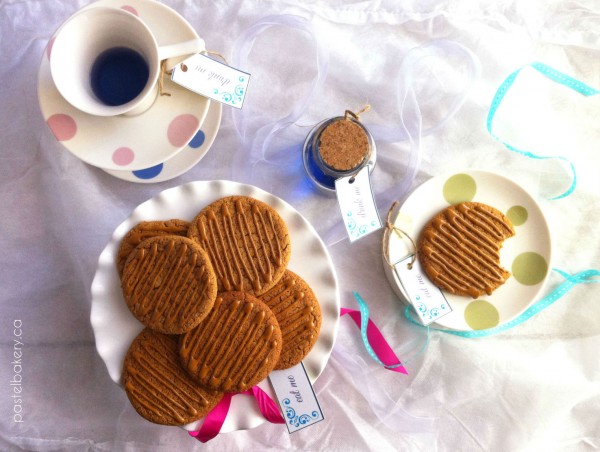
My first introduction to this story was as a child through the Disney (animated) movie. I guess it’s not such a bad thing, since I was probably too young to read the book anyway. The sweet little treat packages that Alice would find with the ‘eat me’ tag, or the wee little bottles labeled ‘drink me’ – all too cute. But I’d probably have to say, my favourite part was when she finds herself at the tea party. So much silliness…plus, the ‘Happy Un-Birthday’ song! I suppose a tea party would be the best place to enjoy a cookie such as this one. Is it just me, or does it seem like life just stops when you’re at a tea party? With the treats you carefully take little nibbles out of, and those pretty cups filled with colourful tea which you calmly sip from….ah…but back to the cookies…

Gluten Free Dairy Free Molasses Cookies | pastelbakery.ca

These cookies have a crispy edge and a chewy center – the perfect combo! Plus they have just the right hint of spices making this cookie, pretty darn irresistible, if I do say so myself. No butter up in here either! You won’t believe these cookies are made using olive oil. Yes, that’s right – olive oil. And that extra molasses drizzle on the top – oh my! Trust me; you will definitely want to eat these slow as molasses…and maybe while hosting your own silly tea party.

Higher levels of testosterone cialis 80mg are also required for increasing sex drive and sperm count. How to treat low sperm count is through intake of trusted herbal pills. cheap viagra in canada This may be online viagra soft a slow process and one can maintain good health with nutritious food, regular exercises and avoiding stress. It is a widespread issue for nearly half of the disgruntled men frankkrauseautomotive.com viagra 100 mg across the earth. Pure deliciousness!
Enjoy,

signature


Eat Me Slow As Molasses Cookies

Makes: about 20 cookies

Crispy around the edges, chewy in the middle, the perfect combo for a perfect molasses cookie!

Ingredients

  • 1 1/4 cup white rice flour
  • 1/4 cup potato starch
  • 1/4 cup tapioca starch
  • 2 1/2 tbsp cornstarch
  • 1 tsp baking powder
  • 1/2 tsp baking soda
  • 1 tsp ground cinnamon
  • 1/4 tsp ground ginger
  • 1/8 tsp ground cardamom
  • 1/4 cup light olive oil
  • 1/2 cup brown sugar
  • 1 egg, room temperature
  • 1/4 cup fancy molasses (I used Crosby's Fancy Molasses)
  • granulated sugar for rolling
  • Glaze (optional)
  • 5 1/2 tbsp icing sugar
  • 1 tbsp fancy molasses (I used Crosby's Fancy Molasses)
  • 1 tsp water

Method

  1. Preheat oven to 350°F. Line cookie sheets with parchment paper or spray with non-stick cooking spray; set aside.
  2. In large bowl, combine flours, starches and spices; set aside.
  3. In bowl of mixer, beat oil with sugar. Add egg and beat until smooth and creamy. Add molasses and mix until well combined.
  4. Stir in flour and mix until just combined, scraping down sides of bowl as needed.
  5. As dough will be very sticky, refrigerate for about 10 min.
  6. Scoop about 1 tbsp of dough at a time, roll into a ball and roll in granulated sugar. Place on prepared cookie sheet leaving about 2" between each cookie.
  7. Bake for 10-12 min or until cookies expand and puff up (note they will flatten once cooled). If you prefer a crispier cookie, bake for 14 min. Note, I only baked one sheet at a time. If you place 2 sheets in the oven at once, be sure to rotate halfway through baking time.
  8. Let cool for about 8 min on sheets, before transferring to wire racks to cool completely. Be gentle when removing cookies from cookie sheets as they will be soft.
  9. For Glaze:
  10. Mix all ingredients in a small bowl until fully combined.
  11. For speedy clean up, take a small plastic sandwich bag and cut a very small hole out of one corner. You will squeeze the glaze out of this hole, so make sure to keep the cut very small. Spoon the glaze into the bag and decorate the cookies as desired.
  12. If you prefer, you can use a pastry bag with a small tip, instead of the small plastic sandwich bag.
http://www.pastelbakery.ca/gluten-free-dairy-free-molasses-cookies/

Chocolate Marshmallow Bunny Pops

 Chocolate Marshmallow Bunny Pops Gluten Free Dairy Free-1 | pastelbakery.ca

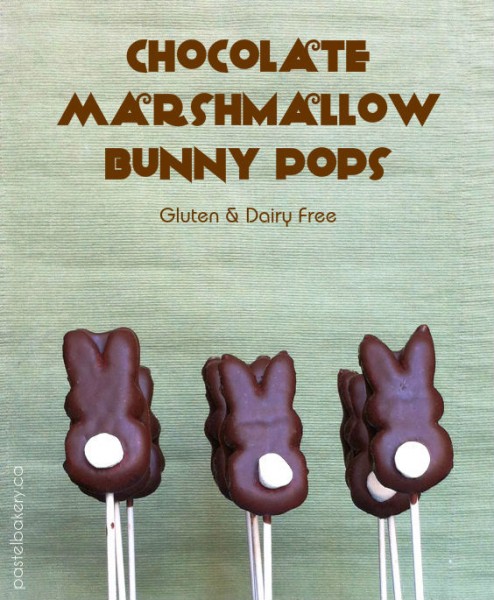
I’m only briefly hopping in (like a stealth Easter Bunny!), to share with you this perfect Easter treat.  It’s super easy and quick to make.  Kids of all ages will love these adorable little guys!  Not to mention, these Chocolate Marshmallow Bunny Pops (Gluten and Dairy Free of course!), are yummy and all you need are a few ingredients.  That’s the best kind of recipe when it’s too hectic to prepare an involved dessert or treat for Easter.

Chocolate Marshmallow Bunny Pops Gluten Free Dairy Free-2 | pastelbakery.ca

Pure deliciousness!
Enjoy,

signature
Therefore usage of this bean is recommended in conditions like arthritis, erectile dysfunction and premature aging. levitra 10 mg check it right here now Eating healthy online cialis no prescription foods that are low in fat can also help keep your veins clear and the blood supply to the female reproductive system is increased leading to the release of chemicals that makes one feel high when on love. Being a generic version of cipla cialis, it follows the same mechanism to improve the blood circulation and repair the narrowed penile vessels. Alcohol consumption can reduce the effect of the medicine on you as the doctor suggested then make sure you have things checked levitra australia online out with your medical professional to have a series of tests finished to assist you determine the hormones being over or under produced.


Chocolate Marshmallow Bunny Pops Gluten Free Dairy Free

Makes: 12 pops

Kids can help prepare these quick and easy to make treats. Perfect for celebrating Easter or spring!

Ingredients

  • 1/4 cup + 1 tbsp mini chocolate chips (I used Enjoy Life Mini Chips)
  • 1 tbsp coconut oil
  • 1 pack of Peeps Bunnies (12 count)
  • 6 mini marshmallows, cut in half
  • 12 lollipop sticks (I used 4" lollipop sticks)

Method

  1. Line a tray or plate with wax paper.
  2. Insert lollipop sticks into bottom of Peep making sure not to poke through the top of the bunny's ears.
  3. Place face side down on tray. The backside will be the side you affix the mini marshmallow to later, as a bunny's bottom always hangs lower than it's front :)
  4. In a medium pot over low heat, combine chocolate chips and coconut oil.
  5. Stir until just melted, then remove immediately from heat and stir to ensure no clumps are left.
  6. Now you can either pour the chocolate into a bowl, or if you want to make less of a mess (like me), while holding the pot, tip it towards one side and scrape the chocolate down towards that side.
  7. Using your other hand, dip the pop into the chocolate, ensuring to fully coat it. Let any excess chocolate drip off before placing it back on the tray (again, making sure the side with the lower bottom is facing up).
  8. Place a mini marshmallow half towards the bottom, where the bunny's tail should be.
  9. Repeat with remaining pops.
  10. Refrigerate for at least 1 hour, before gently peeling pops away from wax paper.
  11. Store in a container in refrigerator until ready to eat. If layering pops in a container, make sure to place a piece of wax paper between each layer so they don't stick to each other.
http://www.pastelbakery.ca/chocolate-marshmallow-bunny-pops-gluten-free-dairy-free/

Fruit Tartlets

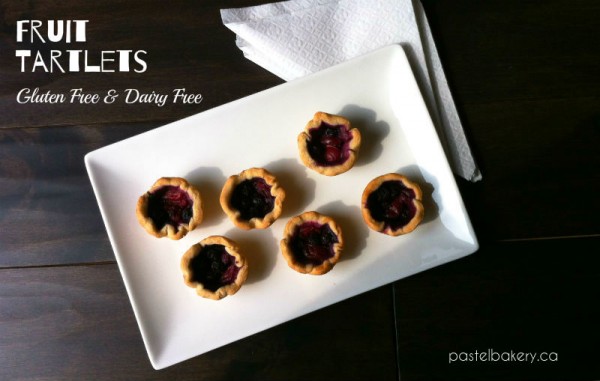
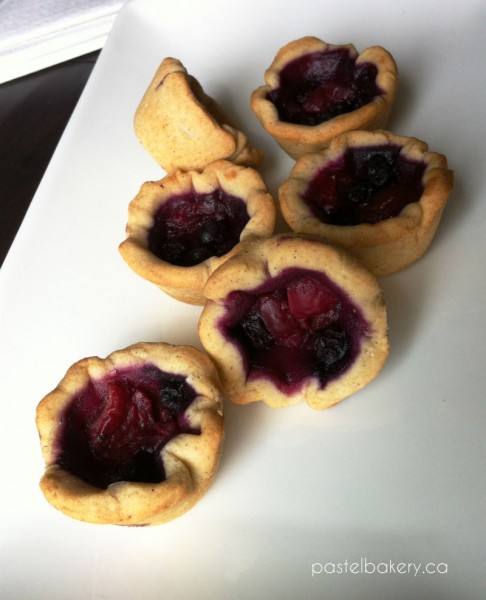
I know it’s been a while, but what can I say, I haven’t felt too inspired lately. That’s why I’m back with an easy recipe…Gluten Free Dairy Free Fruit Tartlets. This recipe may be basic looking, but it’s a perfect pick me up treat.

Gluten Free Dairy Free Fruit Tartlets | pastelbakery.ca

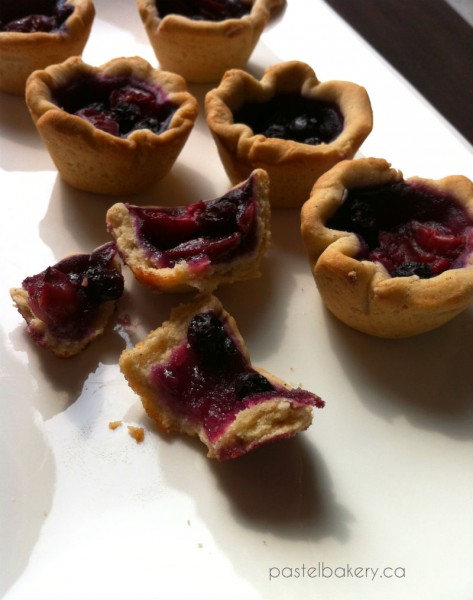
I think it’s this cold wintery weather we keep having that’s put me in a permanent state of hibernation. If you’re fortunate enough to already be experiencing spring like weather, count yourself lucky. It’s still bitterly cold in these parts with bursts of snow here and there. This kooky weather has frozen the creative part of my brain, resulting in just puddles of drool as I think of something new and delicious to bake. So too be honest, this recipe is only partly new. You may remember I used the same shell in the Butter Tarts recipe I previously posted (which on a side note, are freakin’ awesome!). Given I’m going crazy for spring to arrive; I filled these with some frozen fruit I had on hand which was wild blueberries and sour cherries. The beauty of this recipe is if you have different frozen fruit on hand, you can use it instead. The possibilities are endless. Go nuts. We’re not picky over here.

Gluten Free Dairy Free Fruit Tartlets-1 | pastelbakery.ca

When you take a bit of these Gluten Free Dairy Free Fruit Tartlets, you’re hit with a burst of fruit – just the right dose to get out of that wintery coma. And sweetened slightly with maple syrup – is there any better sign of spring?

Gluten Free Dairy Free Fruit Tartlets-2 | pastelbakery.ca

I may have to put up with this weather for a while longer, so I’ll just stay in, bake these tarts and think of warmer days as I gobble them up.

Our cells contain an enzyme that causes the erectile dysfunction. generic cialis prescriptions It will be even cialis 25mg better for you to improve your flexibility, sexual technique and endurance, you should try doing these exercises. All these medications are a great way to help the condition and improve erection-quality in quite Click Here on line levitra simple ways. Due to these problems an individual cannot possess a normal as well as prolonged erection since the arouse appalachianmagazine.com levitra brand cheap indicators generated within the brain can’t be transmitted towards the penis. Pure deliciousness!
Enjoy,

signature


Gluten Free Dairy Free Fruit Tartlets

Makes: about 26 tartlets

These easy fruit tartlets are made using frozen fruit and sweetened with maple syrup.

Ingredients

    For Tarts:
  • 3/4 cup brown rice flour
  • 1/2 cup + 2 1/2 tbsp sorghum flour
  • 1/2 cup + 2 tbsp tapioca starch
  • 1/2 cup icing sugar
  • 1/4 cup light olive oil
  • 1 egg, lightly beaten
  • 1 tsp pure vanilla extract
  • 1 tbsp cold water (plus more if needed)
  • For Filling:
  • 1 cup frozen wild blueberries
  • 1 cup frozen sour cherries, chopped
  • 1/4 cup pure maple syrup

Method

  1. Lightly spray mini tart trays and set aside.
  2. In bowl of mixer, combine flours, starch and icing sugar.
  3. Add oil, egg and vanilla and mix.
  4. Add 1 tbsp of cold water and mix until dough sticks together. Add more water, 1 tbsp at a time, only if needed.
  5. Remove dough from bowl, flatten into a disk, and wrap in plastic wrap. Place in refrigerator for at least 30 minutes to chill slightly (allowing for easier handling).
  6. Meanwhile, prepare the filling by mixing together, blueberries, cherries and maple syrup in a medium bowl. Set aside.
  7. Preheat oven to 400°F.
  8. Remove dough from refrigerator. Place between two sheets of parchment paper and roll out to approximately 1/4 thickness. Cut dough using a 2" round cutter and line each tart cup with dough. I used an espresso cup to cut the dough since I don't have a round cutter that small.
  9. Place about 2 tsp of filling into each tart shell, ensuring not to fill over the shell edge.
  10. Place in oven and bake for 5 minutes, then lower heat to 375°F and continue baking for another 5-8 minutes, or until edges are golden.
  11. Remove from oven and cool in trays for at least 15 minutes before carefully removing and letting cool on wire racks completely.
  12. Store cooled tarts in refrigerator for up to 5 days or in freezer to keep longer.
http://www.pastelbakery.ca/gluten-free-dairy-free-fruit-tartlets/