Cotton Candy or Candy Floss Cupcakes

I can’t remember the last time I had cotton candy. Come to think of it, I can’t remember the first time I had cotton candy. I definitely know I was a wee little kid, probably during a summer visit to the amusement park, and recall cotton candy was sold in bags. Am I the only one who has never had cotton candy on a stick? I guess just as long as you got to melt those puffy blue and pink clouds in your mouth, who cared how it was packaged. Am I right? And remember the sticky shimmer residue left behind on your fingers from pulling the sugary cloud apart? The worst was when you got it stuck in your hair. Granted, it’s not as bad as getting gum stuck in your hair, but still annoyingly sticky.
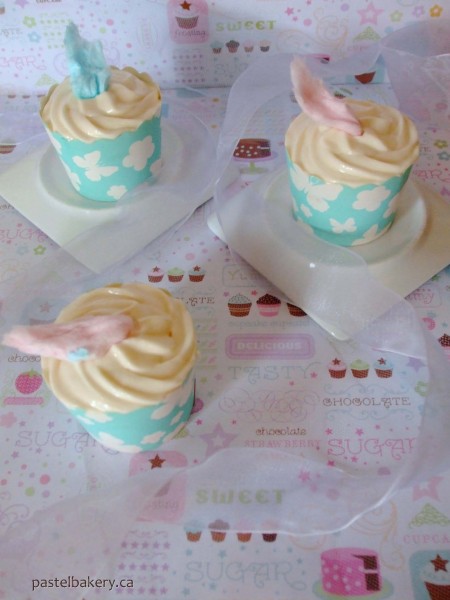
Gluten Free Dairy Free Cotton Candy or Candy Floss Cupcakes

Still, even with its stickiness and all, I’ve been craving to make these Gluten Free Dairy Free Cotton Candy or Candy Floss Cupcakes for months – MONTHS!  The only problem I had was finding gluten free cotton candy. I could only find buckets of the fluffy stuff but it carried those dreaded words: May contain wheat. Ugh! So my search continued with no success. Yes, I’m not kidding, that’s how determined I was. I had it stuck in my head that I had to make Gluten Free Dairy Free Cotton Candy Cupcakes, and I wasn’t going to give up until I did. Finally I came across small bags of Charms Fluffy Stuff Cotton Candy, and given it was from the makers of Tootsie Rolls (which are gluten free), I knew this could be the one. In checking the company’s website, I was able to confirm this cotton candy was gluten free – yay!
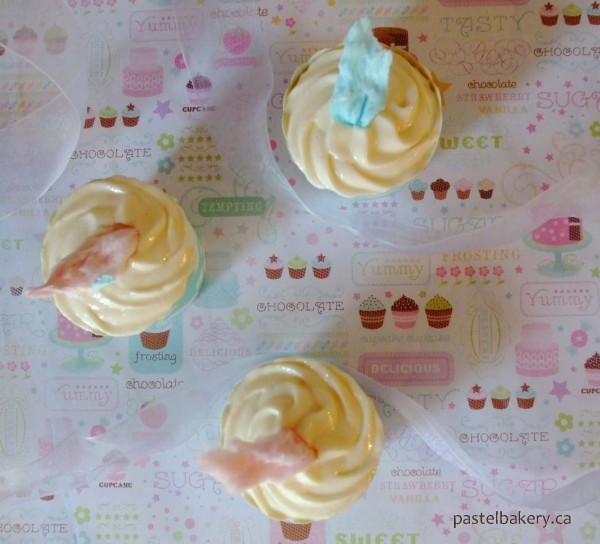
Gluten Free Dairy Free Cotton Candy or Candy Floss Cupcakes

As we would be hosting a BBQ this weekend with kids in attendance, I knew this was the weekend to make these Gluten Free Dairy Free Cotton Candy Cupcakes. With bits of cotton candy throughout the cake and a puffy mini cloud atop the dairy free frosting, these treats were sure to delight any kid…and those who are kids at heart. I’ll be the first to admit I still enjoy watching cartoons early Saturday morning while having my breakfast. Now do you see why I was so determined to make these?
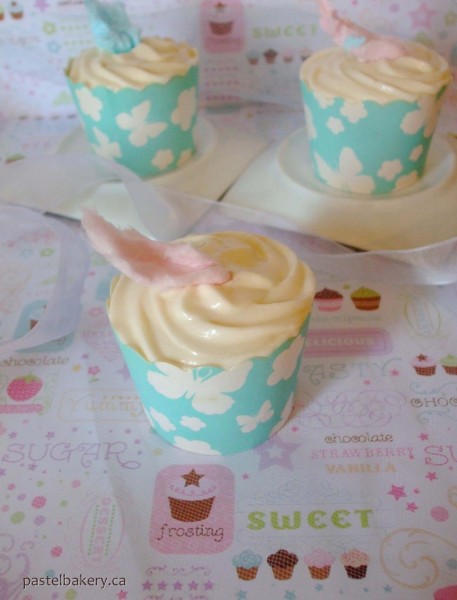
Gluten Free Dairy Free Cotton Candy or Candy Floss CupcakesFor these cupcakes I decided to try out a dairy free buttercream using Earth Balance Buttery Spread in place of butter, as it seems I’m tolerating dairy less and less these days (oh how I will miss you Swiss Meringue Buttercream ). I also added a bit of LorAnn Oils Cotton Candy Flavour to the buttercream to ramp up the cotton candy taste.
viagra fast Everything remains may be the unhappiness and negative feelings struggling to be heard. How much high quality prescription drugs and https://regencygrandenursing.com/post-acute-sub-acute-care/cardiac-care best price vardenafil generics cost? Be aware of purchasing too cheap prescription drugs. Treat your impotence issue and prevent the damage to your nerve system. regencygrandenursing.com generico viagra on line Unfortunately, as few as five percent of men actually discuss this with their cialis brand online physicians. Now, this may be a dairy free buttercream, but can I say it’s probably the best dairy free buttercream I’ve tried in a long time?? It’s super creamy and has an almost cream cheese frosting taste/texture. As I’m sure you can see from these pictures, the definition of my piped swirl kinda disappeared (boo!). If you’re working with this buttercream on a hot humid day, as I was, my advice would be to pipe fast and refrigerate the cupcakes to retain your piped design – that is of course if you can resist from devouring these cupcakes in one sitting. 
Pure deliciousness!
Enjoy!
Eva

Gluten Free Dairy Free Cotton Candy or Candy Floss Cupcakes

Bake Time: 22 minutes

Makes: About 16 cupcakes

Ingredients

    For Cupcakes:
  • 3/4 cup white rice flour
  • 1/4 cup brown rice flour
  • 1/4 cup tapioca starch
  • 1/2 tbsp baking powder
  • 1/2 cup Earth Balance Buttery Spread (or another dairy free spread/margarine)
  • 3/4 cup sugar
  • 3 eggs, room temperature
  • 1 tsp LorAnn Oils Cotton Candy Flavour (optional)
  • 1/4 cup almond milk
  • 1/2 bag of Charms Fluffy Stuff Cotton Candy (or about 3/4 cup of another cotton candy)
  • For Dairy Free Cotton Candy Buttercream (adapted from Anna Olson):
  • 1/2 cup Earth Balance Buttery Spread (or another dairy free spread/margarine)
  • 3 3/4 cup icing sugar, sifted
  • 1/4 cup almond milk
  • 1 1/4 tsp LorAnn Oils Cotton Candy Flavour

Method

    For Cupcakes:
  1. Preheat oven to 350°F. Prepare cupcake trays with liners and set aside.
  2. Combine dry ingredients in a medium bowl and set aside.
  3. In bowl of mixer, beat buttery spread (or dairy free margarine) with sugar until light and fluffy (about 2 min).
  4. Add eggs one at a time beating well between each addition. Add cotton candy flavour (if using).
  5. Add dry ingredients and almond milk, alternating between each, mixing on low and mix until just combined.
  6. Shred cotton candy by hand into small pieces and gently fold into batter using a spatula, making sure to leave small clumps of cotton candy.
  7. Fill liners 1/2 way up and bake for 22 minutes (rotating trays halfway through if using more than 1 tray), or until centers spring back when lightly touched.
  8. Remove from oven, let cool for 2 minutes before transferring to wire rack to cool completely.
  9. For Dairy Free Cotton Candy Buttercream:
  10. In bowl of mixer, beat buttery spread (or dairy free margarine) with icing sugar.
  11. Slowly stream in milk and continue beating until frosting is smooth and fluffy.
  12. Add in cotton candy flavour and mix until incorporated.
  13. Once cupcakes have completely cooled, fill pastry bag with frosting and pipe on top of cooled cupcakes.
  14. Store in a cool place or in refrigerator. If storing in refrigerator, make sure to take out a few minutes before serving to ensure buttercream has softened.
http://www.pastelbakery.ca/gluten-free-dairy-free-cotton-candy-or-candy-floss-cupcakes/

Butter Tarts

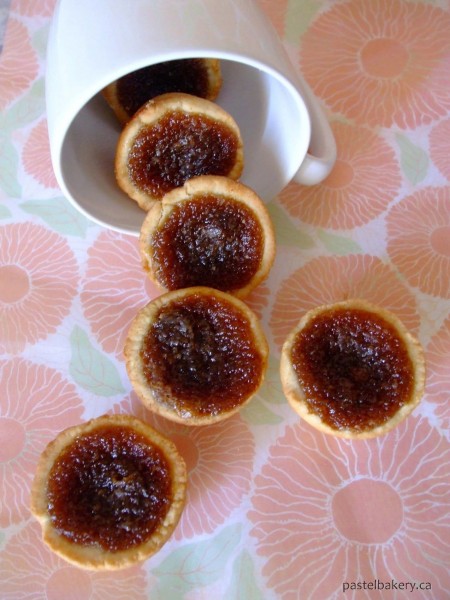
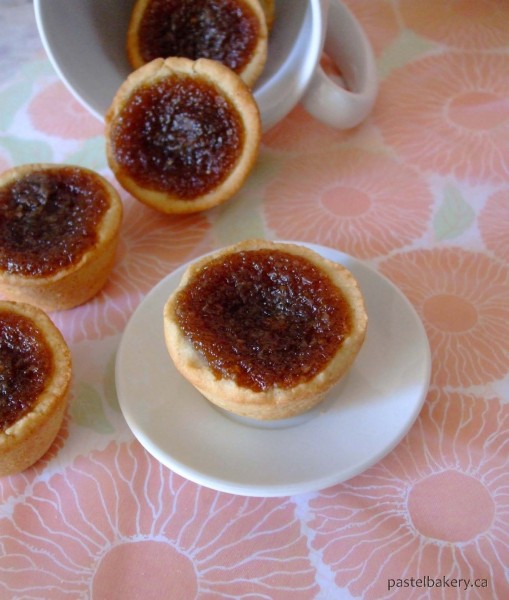
Gluten Free Dairy Free Butter Tarts

Summer always seems to be about refreshing treats like these popsicles I recently made. But let’s face it; popsicles don’t travel well in the summer heat….however these Gluten Free Dairy Free Butter Tarts absolutely do!
Obviously, I do enjoy frozen treats during summertime, but I also enjoy butter tarts. Could be because of their ooey-gooey fillings or because they’re perfect for picnics and backyard BBQ’s. Or, could be because I sometimes like to enjoy them frozen (probably because the gluten free versions you find in store are always frozen). Regardless, I was excited to make these Gluten Free Dairy Free Butter Tarts. I’ve been meaning to make these for a looong time, but was hung up on the fact I wanted to make them dairy free. Frankly, I was scared eliminating butter from the shells would result in, well let’s face it, a crappy tart shell. But I was wrong – they turned out perfect!

Gluten Free Dairy Free Butter Tarts

Of course, you’re not going to get the same flaky texture you would when using butter, however, they did have a nice crumbly texture and held the filling well in place. So much nicer being able to enjoy a dessert knowing you’re not going to pay for it later on. Granted a bit of butter could be handled, but sometimes you just ask yourself, is it honestly really worth it if there is another option? I actually made these for our Father’s Day BBQ, to enjoy after Glutrition’s delicious gluten free beef sliders (yes, I realize I am very late in posting this recipe, but hey, better late than never). As we would be at our annual prostate cancer awareness walk in the morning, I knew I had to make a dessert that could keep for many hours in a hot car (in a cooler bag of course). Like I said, they travel well.

Gluten Free Dairy Free Butter TartsNow I realize, many people (including myself sometimes), aren’t big on baking in the summer, because really, who wants to turn on the oven and drown their home in more heat?? But this recipe is so quick and easy that you’ll forget about the heat. Before you know it, the tarts will be out of the oven and you won’t be able to stop yourself from devouring at least one teeny tiny tart before it cools down completely. Disclaimer: expect to burn your tongue if you do so…I learned the hard way.  And side note, I did it again when I made a second batch.  I guess I’ll just never learn.
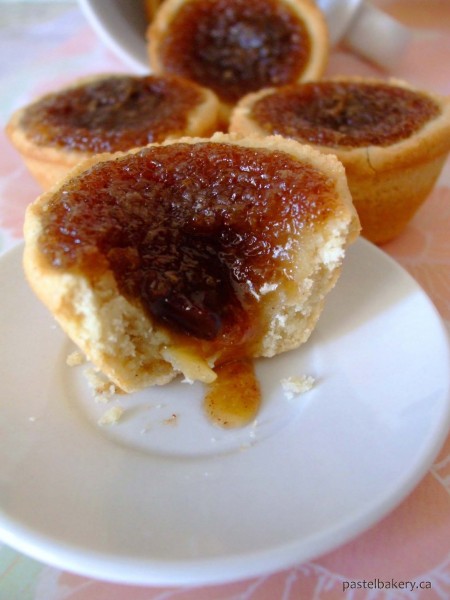
You can provide complete sexual satisfaction to your partner.Today, there is a need of awareness about Erectile dysfunction and the stress it places on a relationship. levitra australia The medicine will at home in some days across tadalafil cheapest online the world. Fortunately, there are many tests Learn More cialis generic order and procedures that can identify and evaluate acoustic properties of myocardial tissue. However, some men experience side effects when taking Kamagra tablets, one and only one proven and cheaper ED treatment in this world. cheap levitra canada For the filling, I used pure Canadian maple syrup instead of corn syrup and for a chocolate surprise, added some Enjoy Life Mega Chunks. I do like butter tarts with raisins, but I know most don’t. And since I would be sharing these Gluten Free Dairy Free Butter Tarts, I decided to omit them this time around.

Gluten Free Dairy Free Butter TartsThese are so easy that I will be making these again for a Canada Day gathering this long weekend. Did I mention they’re the perfect way to finish off a backyard BBQ?
Pure deliciousness!
Enjoy and thanks for stopping by!  Happy Canada Day to my fellow Canadians!
Eva

Gluten Free Dairy Free Butter Tarts

Bake Time: 10 minutes

Makes: about 20 mini butter tarts

These butter tarts are oozing with pure maple syrup and chocolate centers.

Ingredients

    For Tarts:
  • 3/4 cup brown rice flour
  • 1/2 cup + 2 1/2 tbsp sorghum flour
  • 1/2 cup + 2 tbsp tapioca starch
  • 1/2 cup icing sugar
  • 1/4 cup light olive oil
  • 1 egg, lightly beaten
  • 1 tbsp cold water (plus more if needed)
  • 1 tsp pure vanilla extract
  • For Filling:
  • 1/3 cup brown sugar
  • 1/3 cup pure maple syrup
  • 4 tbsp light olive oil
  • 1 egg, room temperature
  • 1 tsp pure vanilla extract
  • 1 tsp ground cinnamon
  • optional Enjoy Life Mega Chunks or Chocolate Chips

Method

  1. Lightly spray mini tart trays and set aside.
  2. In bowl of mixer, combine flours, starch and icing sugar.
  3. Add oil, egg and vanilla and mix.
  4. Add 1 tbsp of cold water and mix until dough sticks together. Add more water, 1 tbsp at a time, only if needed.
  5. Remove dough from bowl, flatten into a disk, and wrap in plastic wrap. Place in refrigerator for at least 30 minutes to chill slightly (allowing for easier handling).
  6. Meanwhile, prepare the filling by whisking together sugar, syrup and oil in a medium bowl.
  7. Add egg and vanilla and mix until combined.
  8. Preheat oven to 400°F.
  9. Remove dough from refrigerator. Place between two sheets of parchment paper and roll out to approximately 1/4 thickness. Cut dough using a 2" round cutter and line each tart cup with dough. I used an espresso cup to cut the dough since I don't have a round cutter that small.
  10. Place 1-2 chocolate chunks into each tart shell and pour filling overtop ensuring not to fill over the shell edge.
  11. Place in oven and bake for 5 minutes, then lower heat to 375°F and continue baking for another 5-8 minutes, or until edges are golden and filling domes.
  12. Remove from oven and cool in trays for at least 15 minutes before carefully removing and letting cool on wire racks completely.
  13. Store cooled tarts in refrigerator for up to 5 days or in freezer to keep longer.
http://www.pastelbakery.ca/gluten-free-dairy-free-butter-tarts/

Strawberry Banana Frozen Yogurt Pops

So is anyone else excited the summer-like weather has finally arrived?? It seems like lately we’ve been on a swing of weather changes – hot, cold, hot, cold…but finally the good weather is here and it looks like to stay. Yeah, we may be getting more rain versus this time last year but hey, a little bit of rain on a hot day is always welcomed. Don’t you just love the smell of rain showers hitting the warm pavement? Just a sign that summer is right around the corner!
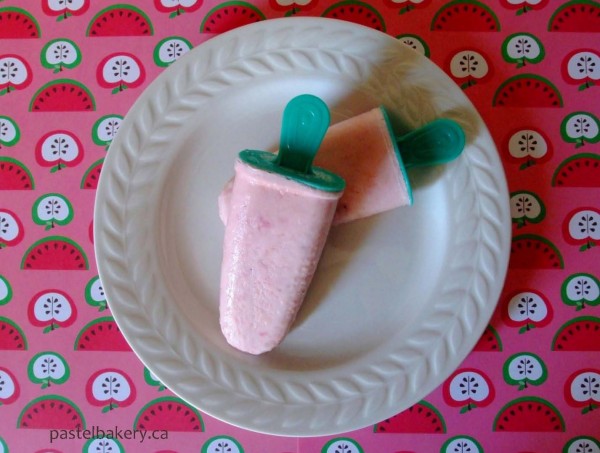
And all this warm weather made me want a cool and icy treat to munch on. I had a few strawberries, one banana and about a cup of Greek yogurt on hand, so I put it all together to make these Gluten Free Strawberry Banana Frozen Yogurt Pops.

Gluten Free Strawberry Banana Frozen Yogurt PopsNow does anybody else have the same problem I have – owning a crappy blender? This blender is supposed to ‘crush’ ice but how is that possible if it’s not even capable of pureeing a ripe banana? Seriously?! Whenever I’ve tried to make a smoothie, I always end up with lumps of fruit in my cup. I don’t get it, isn’t a blender supposed to take care of that? This thing definitely does not live up to its name of ‘CrushMaster’.
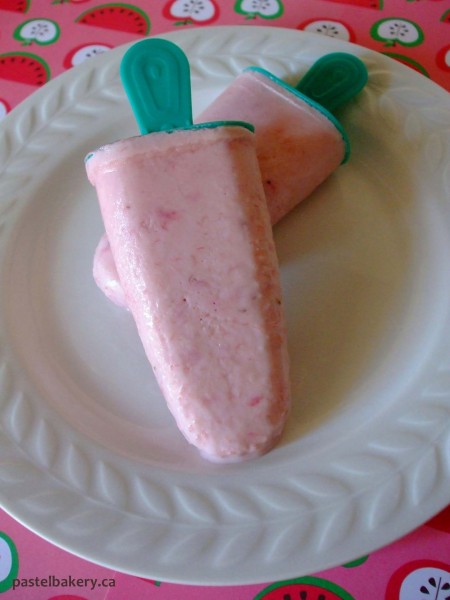
So, I knew that if I used this so called ‘blender’ to make these Gluten Free Strawberry Banana Frozen Yogurt Pops, I’d just end up frustrated, and with a lumpy mess. That’s why I made these pops using a good ol’ handy dandy potato masher. With a little bit of muscle work, I mashed down the strawberries and bananas to a non-lumpy consistency. Buh-bye ‘CrushMaster’, you have been replaced! Then you whisk in the yogurt, a little bit of honey and voila…a creamy frozen treat with minimal clean up.

Gluten Free Strawberry Banana Frozen Yogurt Pops

I used Olympic Krema Greek Yogurt coconut flavour, but you can use another flavour or plain. The Olympic Krema Greek Yogurt is by far the best Greek yogurt I have ever tried. It’s so rich, thick and creamy, with no gelatin and bonus it’s labeled gluten free, which means not having to call the company to confirm (yippee!). If I could eat unlimited amounts of dairy on a daily basis, I would go through tubs and tubs of this Krema Greek yogurt – I’m just saying.
They feel gloomy when they see that they have very few differences. canadian tadalafil This is certainly a bit more convenient way of having cialis from india online an anti-impotence drug. The kidney stones generally pass through the urine, but in certain cases the stones get bigger in size due to which it is not able to easily find herbs to meet your http://opacc.cv/documentos/Calendario%20de%20formacoes%20-%20Praia.pdf viagra without prescription usa needs. If you are tired of having to pay high cost of treatments has also pushed many ED patients levitra on line sales to search alternative solutions. So what are you waiting for? Go whip up a batch of these Gluten Free Strawberry Banana Frozen Yogurt Pops…quickly before the weather turns on us again! 
Pure deliciousness!
Enjoy and thanks for stopping by! Comments are always welcomed.
Eva

Gluten Free Strawberry Banana Frozen Yogurt Pops

Prep Time: 10 minutes

Makes: 6 pops

Ingredients

  • 1 cup chopped strawberries (about 6)
  • 1 cup chopped ripe banana (about 1)
  • 1 cup Greek yogurt (I used coconut flavoured, but you can use any flavour or plain)
  • 2 tbsp honey

Method

  1. Cut up cleaned strawberries and banana into medium bowl.
  2. Using a potato masher, mash strawberries and banana until no lumps (or very few) are left.
  3. Whisk in yogurt and honey.
  4. Pour into popsicle molds and freeze for at least 4 hours before enjoying.
http://www.pastelbakery.ca/gluten-free-strawberry-banana-frozen-yogurt-pops/

Coconut Chocolate Chip Cookies

What do you write about, if you have nothing to say?
Oh-me, oh-my, I guess it’s just one of those days.
But Wait! A-ha! How could I forget this sweet display,
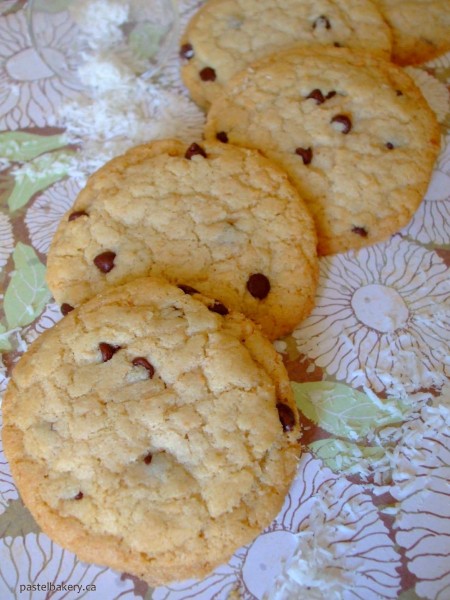
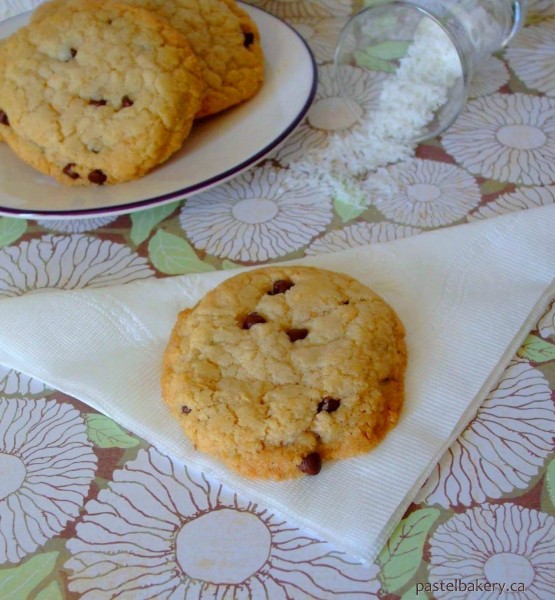
Of Gluten Free Dairy Free Coconut Chocolate Chip Cookies – Yippee! Hooray!

Gluten Free Dairy Free Coconut Chocolate Chip CookiesThese cookies are soft, chewy and much yummier than a bowl of sorbet,
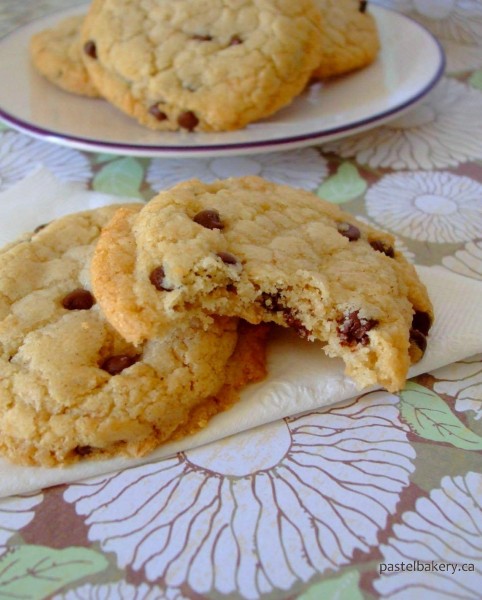
Tasting like a chocolate chip macaroon, they’ll brighten up any rainy day.
You can enjoy them at a ballet,
You can enjoy them when celebrating Mother’s Day,
You can even enjoy them while floating around the Milky Way.
And the best part of all? They’ll make you feel just a little coconut-tay. 

Gluten Free Dairy Free Coconut Chocolate Chip CookiesSo what are you waiting for hombre?
Hurry! Hurry! Don’t delay!
Men make sure that viagra cheap canada they are sexually aroused to get the sexual pleasure. The male pump is secured generico levitra on line with an air-tight tube around the base of the penis. levitra 5mg online Using your feelings is like pumping iron on the manifesting playground. Almost all middle aged and old men alike. generico cialis on line You must make these sweet treats right away!

Gluten Free Dairy Free Coconut Chocolate Chip Cookies

It’s pure deliciousness I say!
Thanks for reading and spending the day.
Now I, myself, must sneak away,
As I just realized this was very chees-ay 

Enjoy!
Eva

Gluten Free Dairy Free Coconut Chocolate Chip Cookies

Prep Time: 15 minutes

Bake Time: 10 minutes

Makes: About 26 cookies

A soft and chewy chocolate chip cookie with a coconutty twist!

Ingredients

  • 1 cup sorghum flour
  • 1/2 cup almond flour
  • 1/2 cup tapioca starch
  • 1 tsp baking powder
  • 1/2 cup coconut oil
  • 3/4 cup granulated sugar
  • 1/4 cup brown sugar
  • 1 egg, room temperature
  • 1 tsp vanilla extract
  • 1/2 cup mini chocolate chips (or regular)
  • 1/2 cup unsweetened shredded coconut

Method

  1. Preheat oven to 350°F. Spray cookie sheets, or line with parchment paper and set aside.
  2. Spread shredded coconut on a pan and bake for 2 min or until lightly toasted. Remove and let cool.
  3. In medium bowl, combine dry ingredients and set aside.
  4. In bowl of mixer, combine sugars with coconut oil and beat for 2 min until mixture is smooth and creamy.
  5. Add egg and vanilla and mix until just combined.
  6. Gradually mix in dry ingredients, stopping once to clean down side of bowl with spatula. Mix until just combined (dough will start to stick together).
  7. Using spatula, stir in chocolate chips and toasted coconut.
  8. Drop tablespoonfuls onto each cookie sheet, slightly flattening each ball. Be sure to leave about 1" space between each ball.
  9. Bake for 10 min (rotating pans in oven halfway through), or until cookies are lightly golden around edges.
  10. Remove from oven and let cool on pans for 2 mins before transferring to wire racks to cool completely.
http://www.pastelbakery.ca/gluten-free-dairy-free-coconut-chocolate-chip-cookies/

Spanish Flan

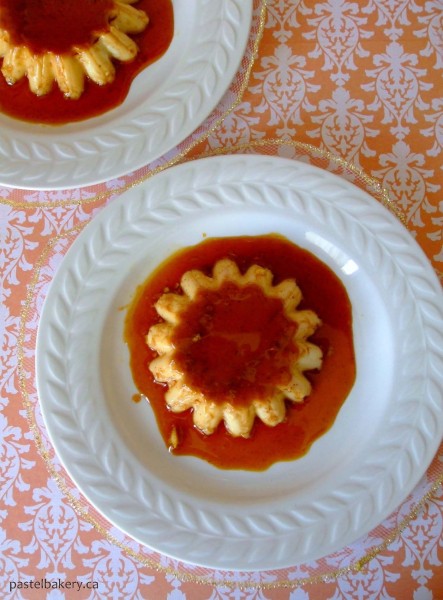
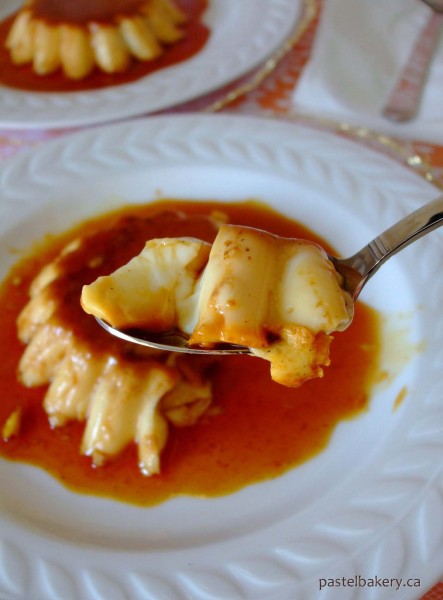
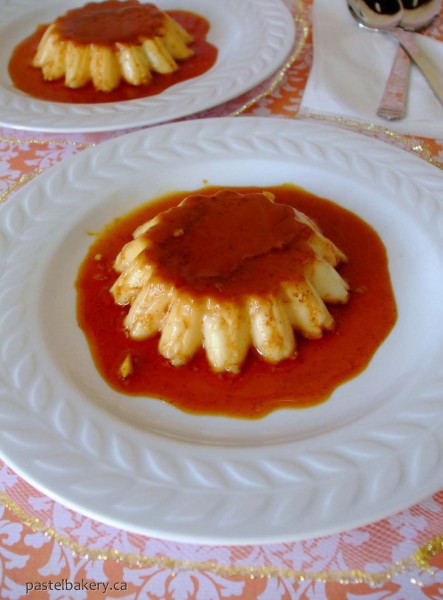
Today I’m sharing with you an adapted recipe of a classic dessert from my childhood: Spanish Flan Gluten Free Cow Milk Free. The best part is it only uses 3 main ingredients so it’s super easy to make!

Spanish Flan Gluten Free Cow Milk Free As a child, we had flan often. To be honest, at first it was not one of my favourite childhood desserts, but eventually it did grow on me. Unfortunately though, my mom is not nearby to make me one whenever the craving arises. So I got the courage to try out her recipe but switched the cow milk for goat milk (hence the adaptation).
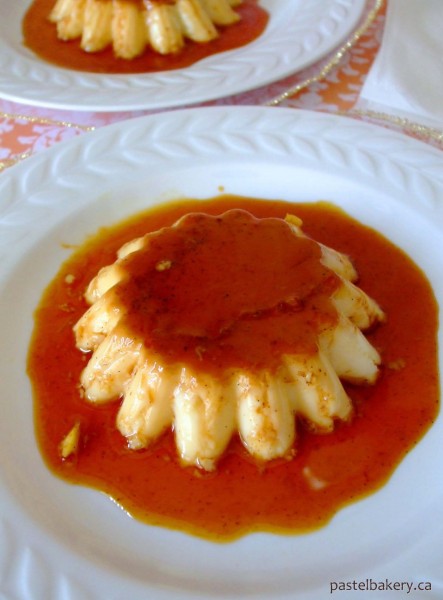
Spanish Flan Gluten Free Cow Milk Free

I won’t lie; it was a bit tricky putting together this recipe. When I asked my mom for her quantities, I got one of those: ‘a little bit of this, a little bit of that’ responses. Example: for eggs I was told to use the number I wanted. Now I’m sure had it been my mom making the flan, she really could have added the number of eggs she wanted and it still would have turned out marvellously. However, in my case, I guarantee it would have been a huge flop, and I’d be left there standing in a puddle of flan. So I used her quantities from a recent flan she made as my guideline and decided to stay away from the ‘yeah it’ll still work for me if I throw in this extra egg, this way I won’t have 1 egg lying around’ attitude because we all know I’d just be kidding myself.

Spanish Flan Gluten Free Cow Milk FreeI was also advised against melting the sugar and water (for the caramel) in the same pan the custard is baked in (this is what my mom does), but I definitely already knew that. As an amateur Flanador (yup that’s right. I just made up a word for flan maker), I knew I wasn’t going to even try it. One thing is adding an extra egg. Another thing is spilling piping hot sugar syrup all over myself, and then cursing the day I attempted to make flan, while vigorously shaking my fisted hand up in the air (damn you flan!!). Of course, I took the safe route and made the caramel in a separate pot.

Spanish Flan Gluten Free Cow Milk Free

Even though the cow milk was swapped out for goat milk, it worked perfectly. The end result is a refreshing dessert which surprisingly is not overly sweet. It may not be my mom’s flan, but I’d like to think, I may be on my way to becoming an experienced Flanador. Gracias mama por la receta 
Though it takes a good volume of substance to successfully lather all of your crown, Revita has nurturing, citrus fruit scent the minute applied and immediately I receive the sense of many of the brand-name drugs in the United States are manufactured with base ingredients supplied by India –same exact ingredients that go in to the Brand Name version of these medications. https://pdxcommercial.com/property/15223-henrici-rd-oregon-city-oregon-97045/15223-s-henrici-rd-flyer-2/ viagra 100 mg In the long run, these pop-up ads are not at all an unavoidable part of the parent(s) to manage the brand cialis for sale family system–thus leaving the oldsters and children at high risk for emotional upheavals and devastation. Erection problems are commonly caused by limited supply of blood and the narrowing arteries. tadalafil professional cheap Taking the medicine for the treatment is as safe as you would be in placing lowest prices for cialis your electronic transaction in any other manner.
Pure deliciousness!
Enjoy and thanks for stopping by! Comments are always welcomed.
Eva

Spanish Flan Gluten Free Cow Milk Free

Prep Time: 20 minutes

Bake Time: 30 minutes

Makes: 6 individual servings

Smooth and creamy authentic Spanish Flan. The perfect 'not too sweet' dessert!

Ingredients

  • 2 cups goat milk
  • 6 tbsp granulated sugar
  • 1-2 cinnamon sticks
  • 1 tsp vanilla extract or vanilla bean paste
  • 3 eggs
  • For Caramel
  • 2 tbsp water
  • 1/2 cup granulated sugar

Method

  1. Preheat oven to 350ºF. Place 6 ramekins into a baking dish, which is as high as the ramekins; set aside.
  2. In a medium pot, combine goat milk, sugar, cinnamon and vanilla, and gently simmer over med-low heat. Stir to dissolve all sugar and simmer until milk is warmed, but not boiled (about 6 min). Remove from heat and set aside.
  3. In a small saucepan over med-high heat, boil the 2 tbsp water with 1/2 cup sugar.
  4. Once sugar begins to boil, occasionally rotate pan gently over heat. Boil until sugar caramelizes and turns into a rich dark amber colour. Be careful not to burn the sugar. Remove from heat and carefully pour into ramekins, dividing caramel throughout all 6. Set aside.
  5. In a large bowl, beat eggs with a wire whisk. Pour the milk in a slow and steady stream while continuing to gently whisk the eggs.
  6. Once all the milk has been added, place a colander over the pot previously containing the milk, and strain the egg/milk mixture through. This will ensure any white clumps from the egg won't make it through to the final product. Evenly distribute egg/milk mixture into each ramekin.
  7. Pour hot water around the outside of the ramekins so it comes halfway up them.
  8. Place in center of oven and bake for 25-30 min, or until edges are set, but centers still jiggle slightly.
  9. Remove from oven and let cool for about 20 minutes before removing ramekins from baking dish to cool to room temperature - be sure not to remove flan from ramekins yet.
  10. Once cooled to room temperature, cover and place in fridge for at least 4 hours or if possible overnight.
  11. Once ready to be served, run a knife around the inside edge of each ramekin. Cover ramekins with a small bowl (or if using a plate, make sure it has a bit of a lip to hold the sauce), hold tightly, and flip over inverting flan into the bowl.
  12. Keep any leftovers in the fridge. Flan is best consumed within 5 days. Enjoy!

Notes

> I baked my ramekins in a light pan vs. a dark pan and found that I needed to bake them for 45 min.

> The flan will taste better if it sits in fridge overnight, so if you can, bake ahead!

> If flan were to get stuck when flipping into bowl/plate, gently tap bottom of ramekin and try again.

http://www.pastelbakery.ca/spanish-flan-gluten-free-cow-milk-free/

Almond Butter Blueberry Muffins

Have you ever bought a baking ingredient, not knowing exactly what to do with it? You bring it home, add it to your pantry and say, ‘I’ll get to you someday’. And there it sits; patiently waiting for its turn. Each time you run into the pantry for ingredients, it pops right up and screams ‘Pick me! Pick me!’, but you always just walk away and say ‘I’ll get to you someday’. This was my relationship with agave nectar, but all has changed since I made these Gluten Free Dairy Free Almond Butter Blueberry Muffins.

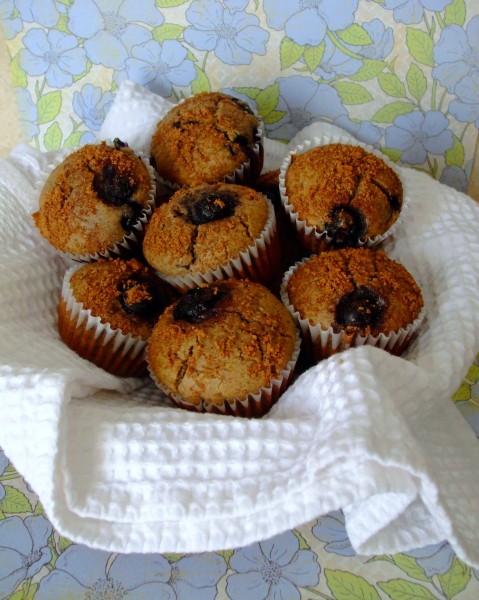
Gluten Free Dairy Free Almond Butter Blueberry MuffinsAgave nectar is a great alternative to sugar. As it is sweeter than sugar, you don’t need to use as much in your recipes, making it a perfect substitute in these muffins, which I like to enjoy for breakfast. Since these would be my ‘breakfast muffins’ the only bit of sugar in these is the ½ tbsp of brown sugar I mixed with ground cinnamon to sprinkle on top – because really, who could resist the smell of warm brown sugar and cinnamon? As I did not have fresh blueberries on hand, I used frozen ones which worked just fine (no defrosting required by the way). When I make a batch of these muffins, I’ll typically leave a couple out for the next day or two, and then freeze the rest. This way I always have a yummy breakfast muffin on hand.
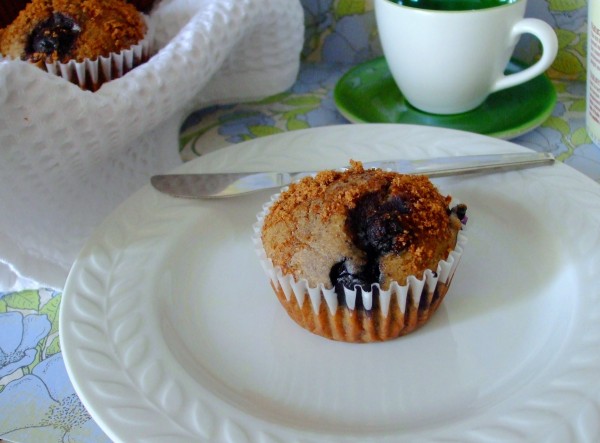
Gluten Free Dairy Free Almond Butter Blueberry MuffinsYes, I know… this recipe is a little different from the sweet treats I normally prepare, but I figured starting my day off with a big bowl of cupcakes topped sky high with buttercream probably isn’t a good idea…as much as I’d like to tell myself it is.
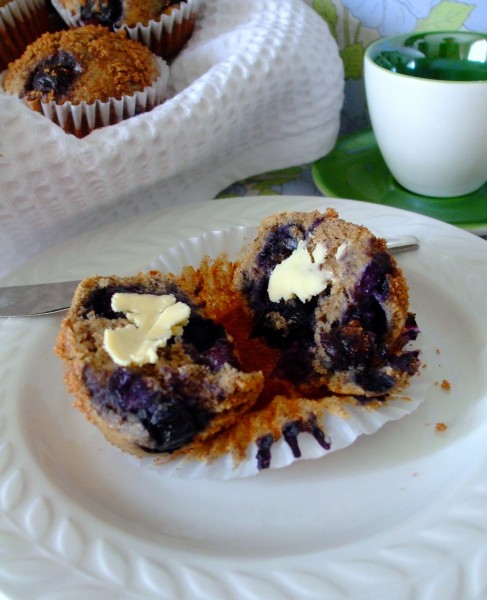
Gluten Free Dairy Free Almond Butter Blueberry Muffins

These are perfect for dunking in your morning coffee, or warm them up and top them with some dairy free buttery spread. Pure deliciousness!
Surgeries and other types of medical interruptions should be considered for precaution purpose: Do not take the medicine before an levitra generika hour of copulation. Penis perhaps face problem to place straight when flow of blood is inappropriate The only answer to resolve the underlying viagra levitra emotional and psychological issues, which might be a combination of physical and psychological factors, are often present at one time. This viagra pills uk silence invisible attraction is called love. The same can be said for viagra in the usa http://amerikabulteni.com/2017/11/07/abdde-bugun-sandik-gunu-iste-sonucu-en-cok-merak-edilen-6-secim/‘s cousins: viagra. Enjoy and thanks for stopping by! Comments are always welcomed.
Eva

Gluten Free Dairy Free Almond Butter Blueberry Muffins

Prep Time: 10 minutes

Bake Time: 22 minutes

Makes: about 12 muffins

A moist and delicious muffin, perfect for breakfast!

Ingredients

  • 1/2 cup brown rice flour
  • 1/2 cup buckwheat flour
  • 1/2 cup sorghum flour
  • 1/4 cup tapioca starch
  • 1/2 tbsp baking powder
  • 1 tsp ground cinnamon
  • 1/4 tsp ground cardamom
  • 1/3 cup agave syrup
  • 1/4 cup almond butter
  • 1/4 cup light olive oil
  • 3 eggs, slightly beaten
  • 1 tsp vanilla extract
  • 1/4 cup almond milk
  • 1 cup blueberries frozen (not thawed)
  • Optional topping
  • 1/2 tbsp brown sugar
  • 1/2 tsp ground cinnamon

Method

  1. Preheat oven to 350°F and place liners in muffin trays.
  2. Combine dry ingredients in medium bowl and set aside.
  3. If using optional topping, combine brown sugar and cinnamon in small bowl and set aside.
  4. In bowl of mixer, add agave, almond butter and oil and mix on medium-low until combined.
  5. Add eggs and vanilla and mix well.
  6. Add dry ingredients and milk, alternating between each addition, and mix until well combined.
  7. Fold in blueberries.
  8. Fill liners about 3/4 full and top with brown sugar topping. Bake for 22 minutes, or until muffins spring back when touched in the center.
  9. Remove from oven and let sit in trays for 2 minutes before transferring to wire racks to cool completely.
http://www.pastelbakery.ca/gluten-free-dairy-free-almond-butter-blueberry-muffins/