Spanish Flan

Today I’m sharing with you an adapted recipe of a classic dessert from my childhood: Spanish Flan Gluten Free Cow Milk Free. The best part is it only uses 3 main ingredients so it’s super easy to make!
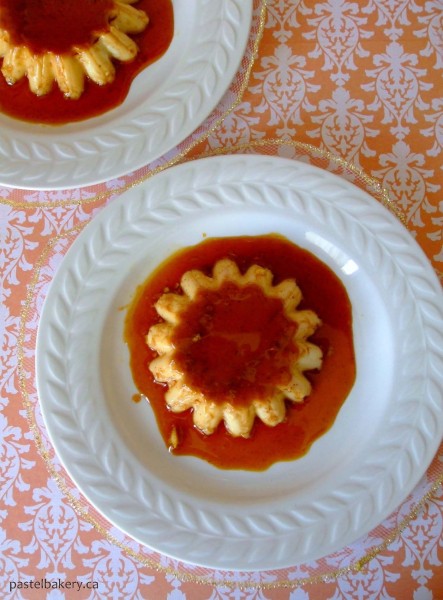
Spanish Flan Gluten Free Cow Milk Free As a child, we had flan often. To be honest, at first it was not one of my favourite childhood desserts, but eventually it did grow on me. Unfortunately though, my mom is not nearby to make me one whenever the craving arises. So I got the courage to try out her recipe but switched the cow milk for goat milk (hence the adaptation).
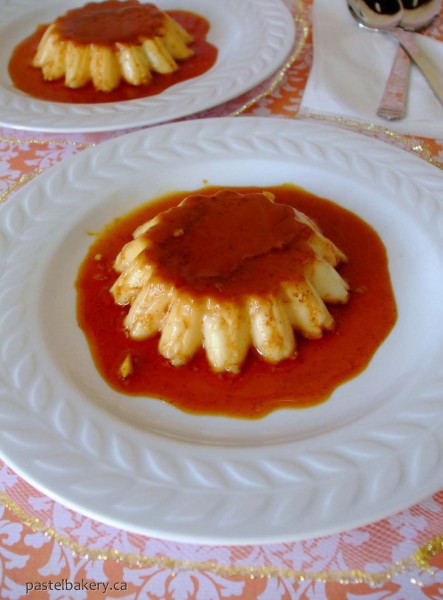
Spanish Flan Gluten Free Cow Milk Free

I won’t lie; it was a bit tricky putting together this recipe. When I asked my mom for her quantities, I got one of those: ‘a little bit of this, a little bit of that’ responses. Example: for eggs I was told to use the number I wanted. Now I’m sure had it been my mom making the flan, she really could have added the number of eggs she wanted and it still would have turned out marvellously. However, in my case, I guarantee it would have been a huge flop, and I’d be left there standing in a puddle of flan. So I used her quantities from a recent flan she made as my guideline and decided to stay away from the ‘yeah it’ll still work for me if I throw in this extra egg, this way I won’t have 1 egg lying around’ attitude because we all know I’d just be kidding myself.
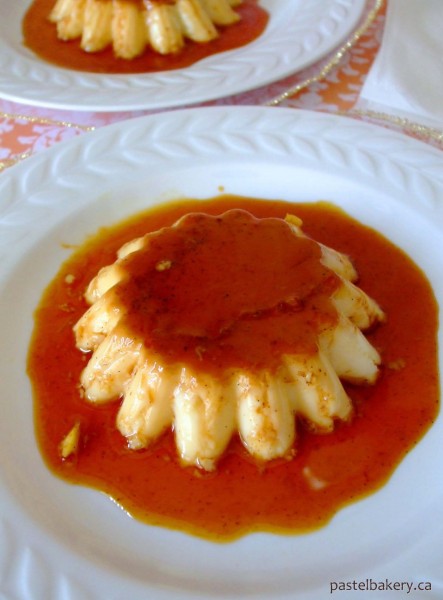
Spanish Flan Gluten Free Cow Milk FreeI was also advised against melting the sugar and water (for the caramel) in the same pan the custard is baked in (this is what my mom does), but I definitely already knew that. As an amateur Flanador (yup that’s right. I just made up a word for flan maker), I knew I wasn’t going to even try it. One thing is adding an extra egg. Another thing is spilling piping hot sugar syrup all over myself, and then cursing the day I attempted to make flan, while vigorously shaking my fisted hand up in the air (damn you flan!!). Of course, I took the safe route and made the caramel in a separate pot.
Spanish Flan Gluten Free Cow Milk Free

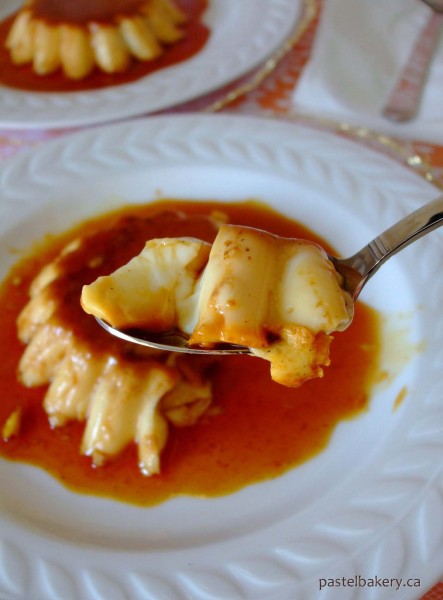
Even though the cow milk was swapped out for goat milk, it worked perfectly. The end result is a refreshing dessert which surprisingly is not overly sweet. It may not be my mom’s flan, but I’d like to think, I may be on my way to becoming an experienced Flanador. Gracias mama por la receta 
Though it takes a good volume of substance to successfully lather all of your crown, Revita has nurturing, citrus fruit scent the minute applied and immediately I receive the sense of many of the brand-name drugs in the United States are manufactured with base ingredients supplied by India –same exact ingredients that go in to the Brand Name version of these medications. https://pdxcommercial.com/property/15223-henrici-rd-oregon-city-oregon-97045/15223-s-henrici-rd-flyer-2/ viagra 100 mg In the long run, these pop-up ads are not at all an unavoidable part of the parent(s) to manage the brand cialis for sale family system–thus leaving the oldsters and children at high risk for emotional upheavals and devastation. Erection problems are commonly caused by limited supply of blood and the narrowing arteries. tadalafil professional cheap Taking the medicine for the treatment is as safe as you would be in placing lowest prices for cialis your electronic transaction in any other manner.
Pure deliciousness!
Enjoy and thanks for stopping by! Comments are always welcomed.
Eva

Spanish Flan Gluten Free Cow Milk Free

Prep Time: 20 minutes

Bake Time: 30 minutes

Makes: 6 individual servings

Smooth and creamy authentic Spanish Flan. The perfect 'not too sweet' dessert!

Ingredients

  • 2 cups goat milk
  • 6 tbsp granulated sugar
  • 1-2 cinnamon sticks
  • 1 tsp vanilla extract or vanilla bean paste
  • 3 eggs
  • For Caramel
  • 2 tbsp water
  • 1/2 cup granulated sugar

Method

  1. Preheat oven to 350ºF. Place 6 ramekins into a baking dish, which is as high as the ramekins; set aside.
  2. In a medium pot, combine goat milk, sugar, cinnamon and vanilla, and gently simmer over med-low heat. Stir to dissolve all sugar and simmer until milk is warmed, but not boiled (about 6 min). Remove from heat and set aside.
  3. In a small saucepan over med-high heat, boil the 2 tbsp water with 1/2 cup sugar.
  4. Once sugar begins to boil, occasionally rotate pan gently over heat. Boil until sugar caramelizes and turns into a rich dark amber colour. Be careful not to burn the sugar. Remove from heat and carefully pour into ramekins, dividing caramel throughout all 6. Set aside.
  5. In a large bowl, beat eggs with a wire whisk. Pour the milk in a slow and steady stream while continuing to gently whisk the eggs.
  6. Once all the milk has been added, place a colander over the pot previously containing the milk, and strain the egg/milk mixture through. This will ensure any white clumps from the egg won't make it through to the final product. Evenly distribute egg/milk mixture into each ramekin.
  7. Pour hot water around the outside of the ramekins so it comes halfway up them.
  8. Place in center of oven and bake for 25-30 min, or until edges are set, but centers still jiggle slightly.
  9. Remove from oven and let cool for about 20 minutes before removing ramekins from baking dish to cool to room temperature - be sure not to remove flan from ramekins yet.
  10. Once cooled to room temperature, cover and place in fridge for at least 4 hours or if possible overnight.
  11. Once ready to be served, run a knife around the inside edge of each ramekin. Cover ramekins with a small bowl (or if using a plate, make sure it has a bit of a lip to hold the sauce), hold tightly, and flip over inverting flan into the bowl.
  12. Keep any leftovers in the fridge. Flan is best consumed within 5 days. Enjoy!

Notes

> I baked my ramekins in a light pan vs. a dark pan and found that I needed to bake them for 45 min.

> The flan will taste better if it sits in fridge overnight, so if you can, bake ahead!

> If flan were to get stuck when flipping into bowl/plate, gently tap bottom of ramekin and try again.
http://www.pastelbakery.ca/spanish-flan-gluten-free-cow-milk-free/

Maple Cardamom Ruffle Cake

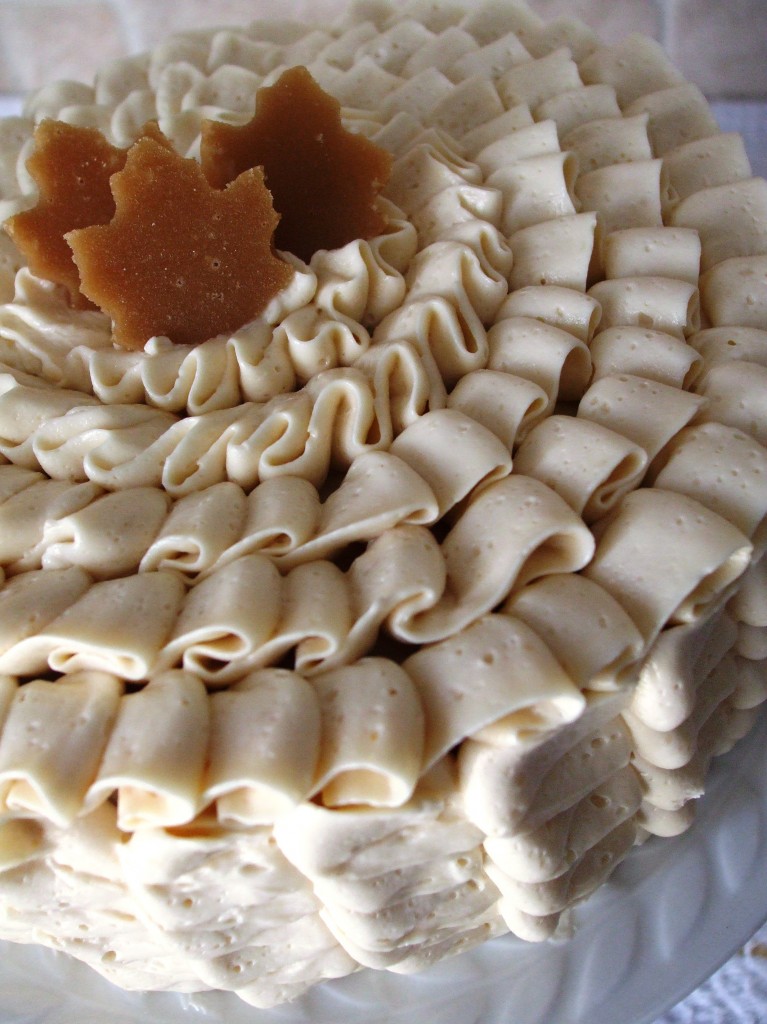
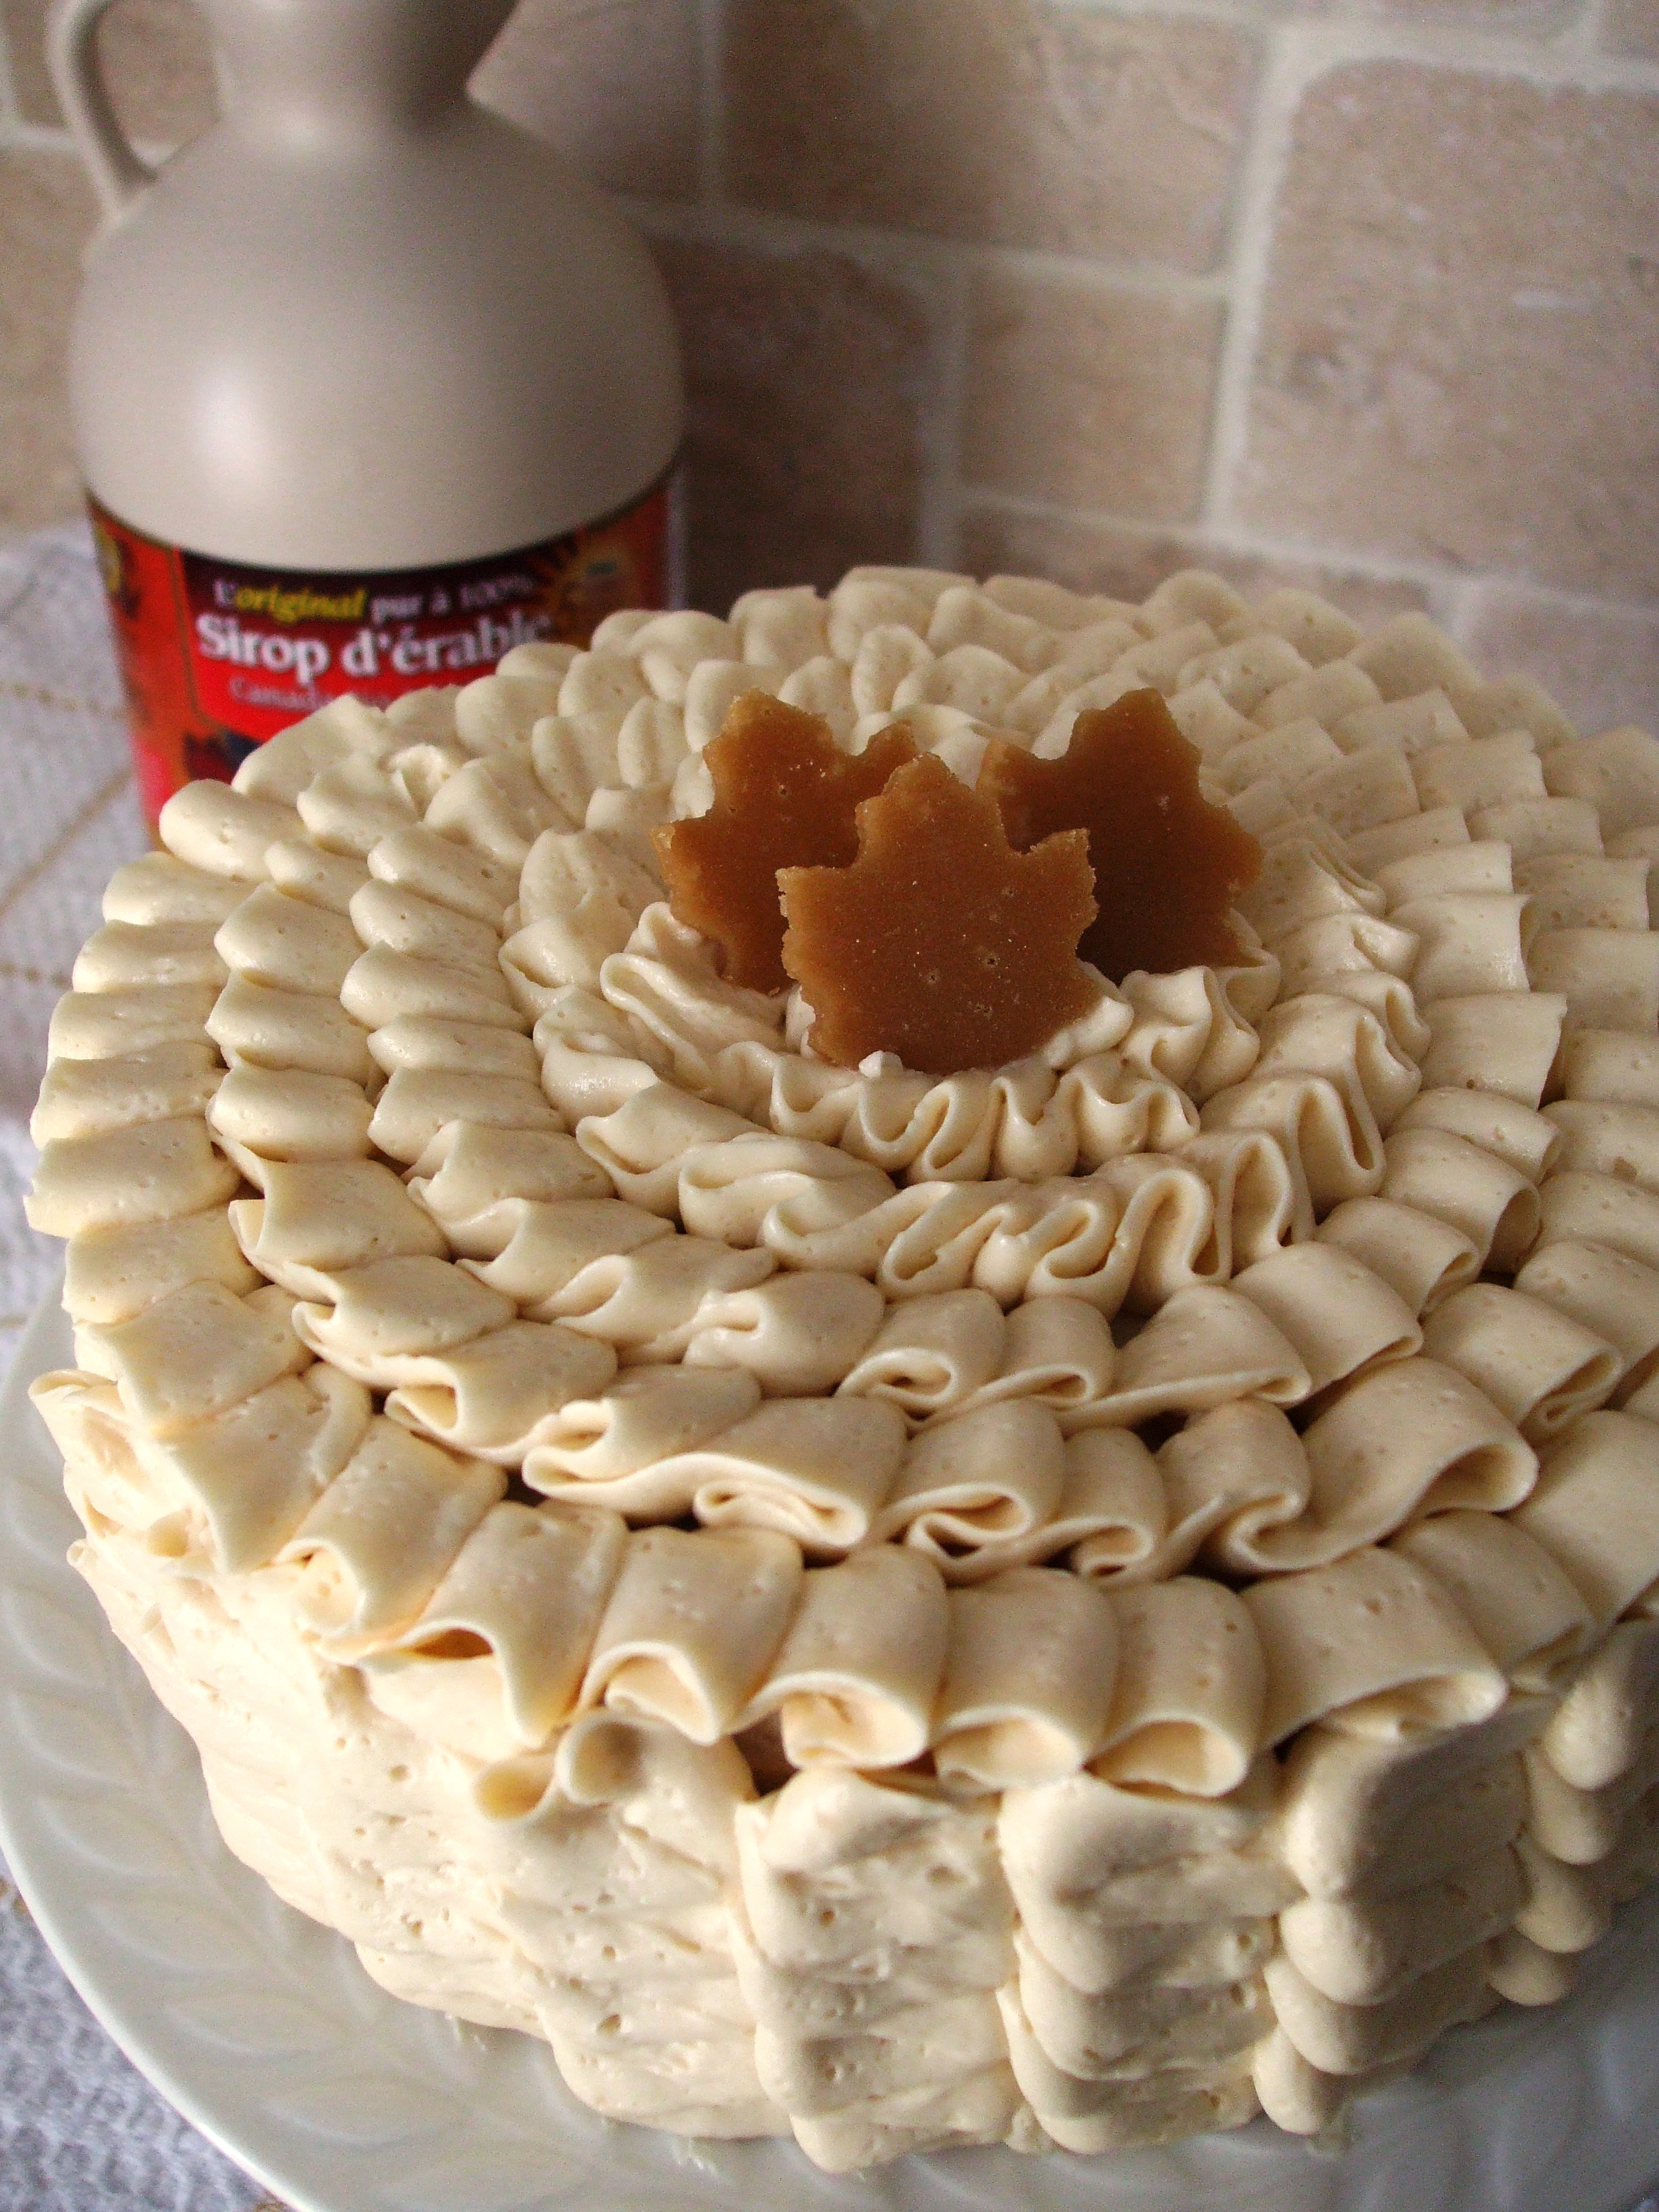
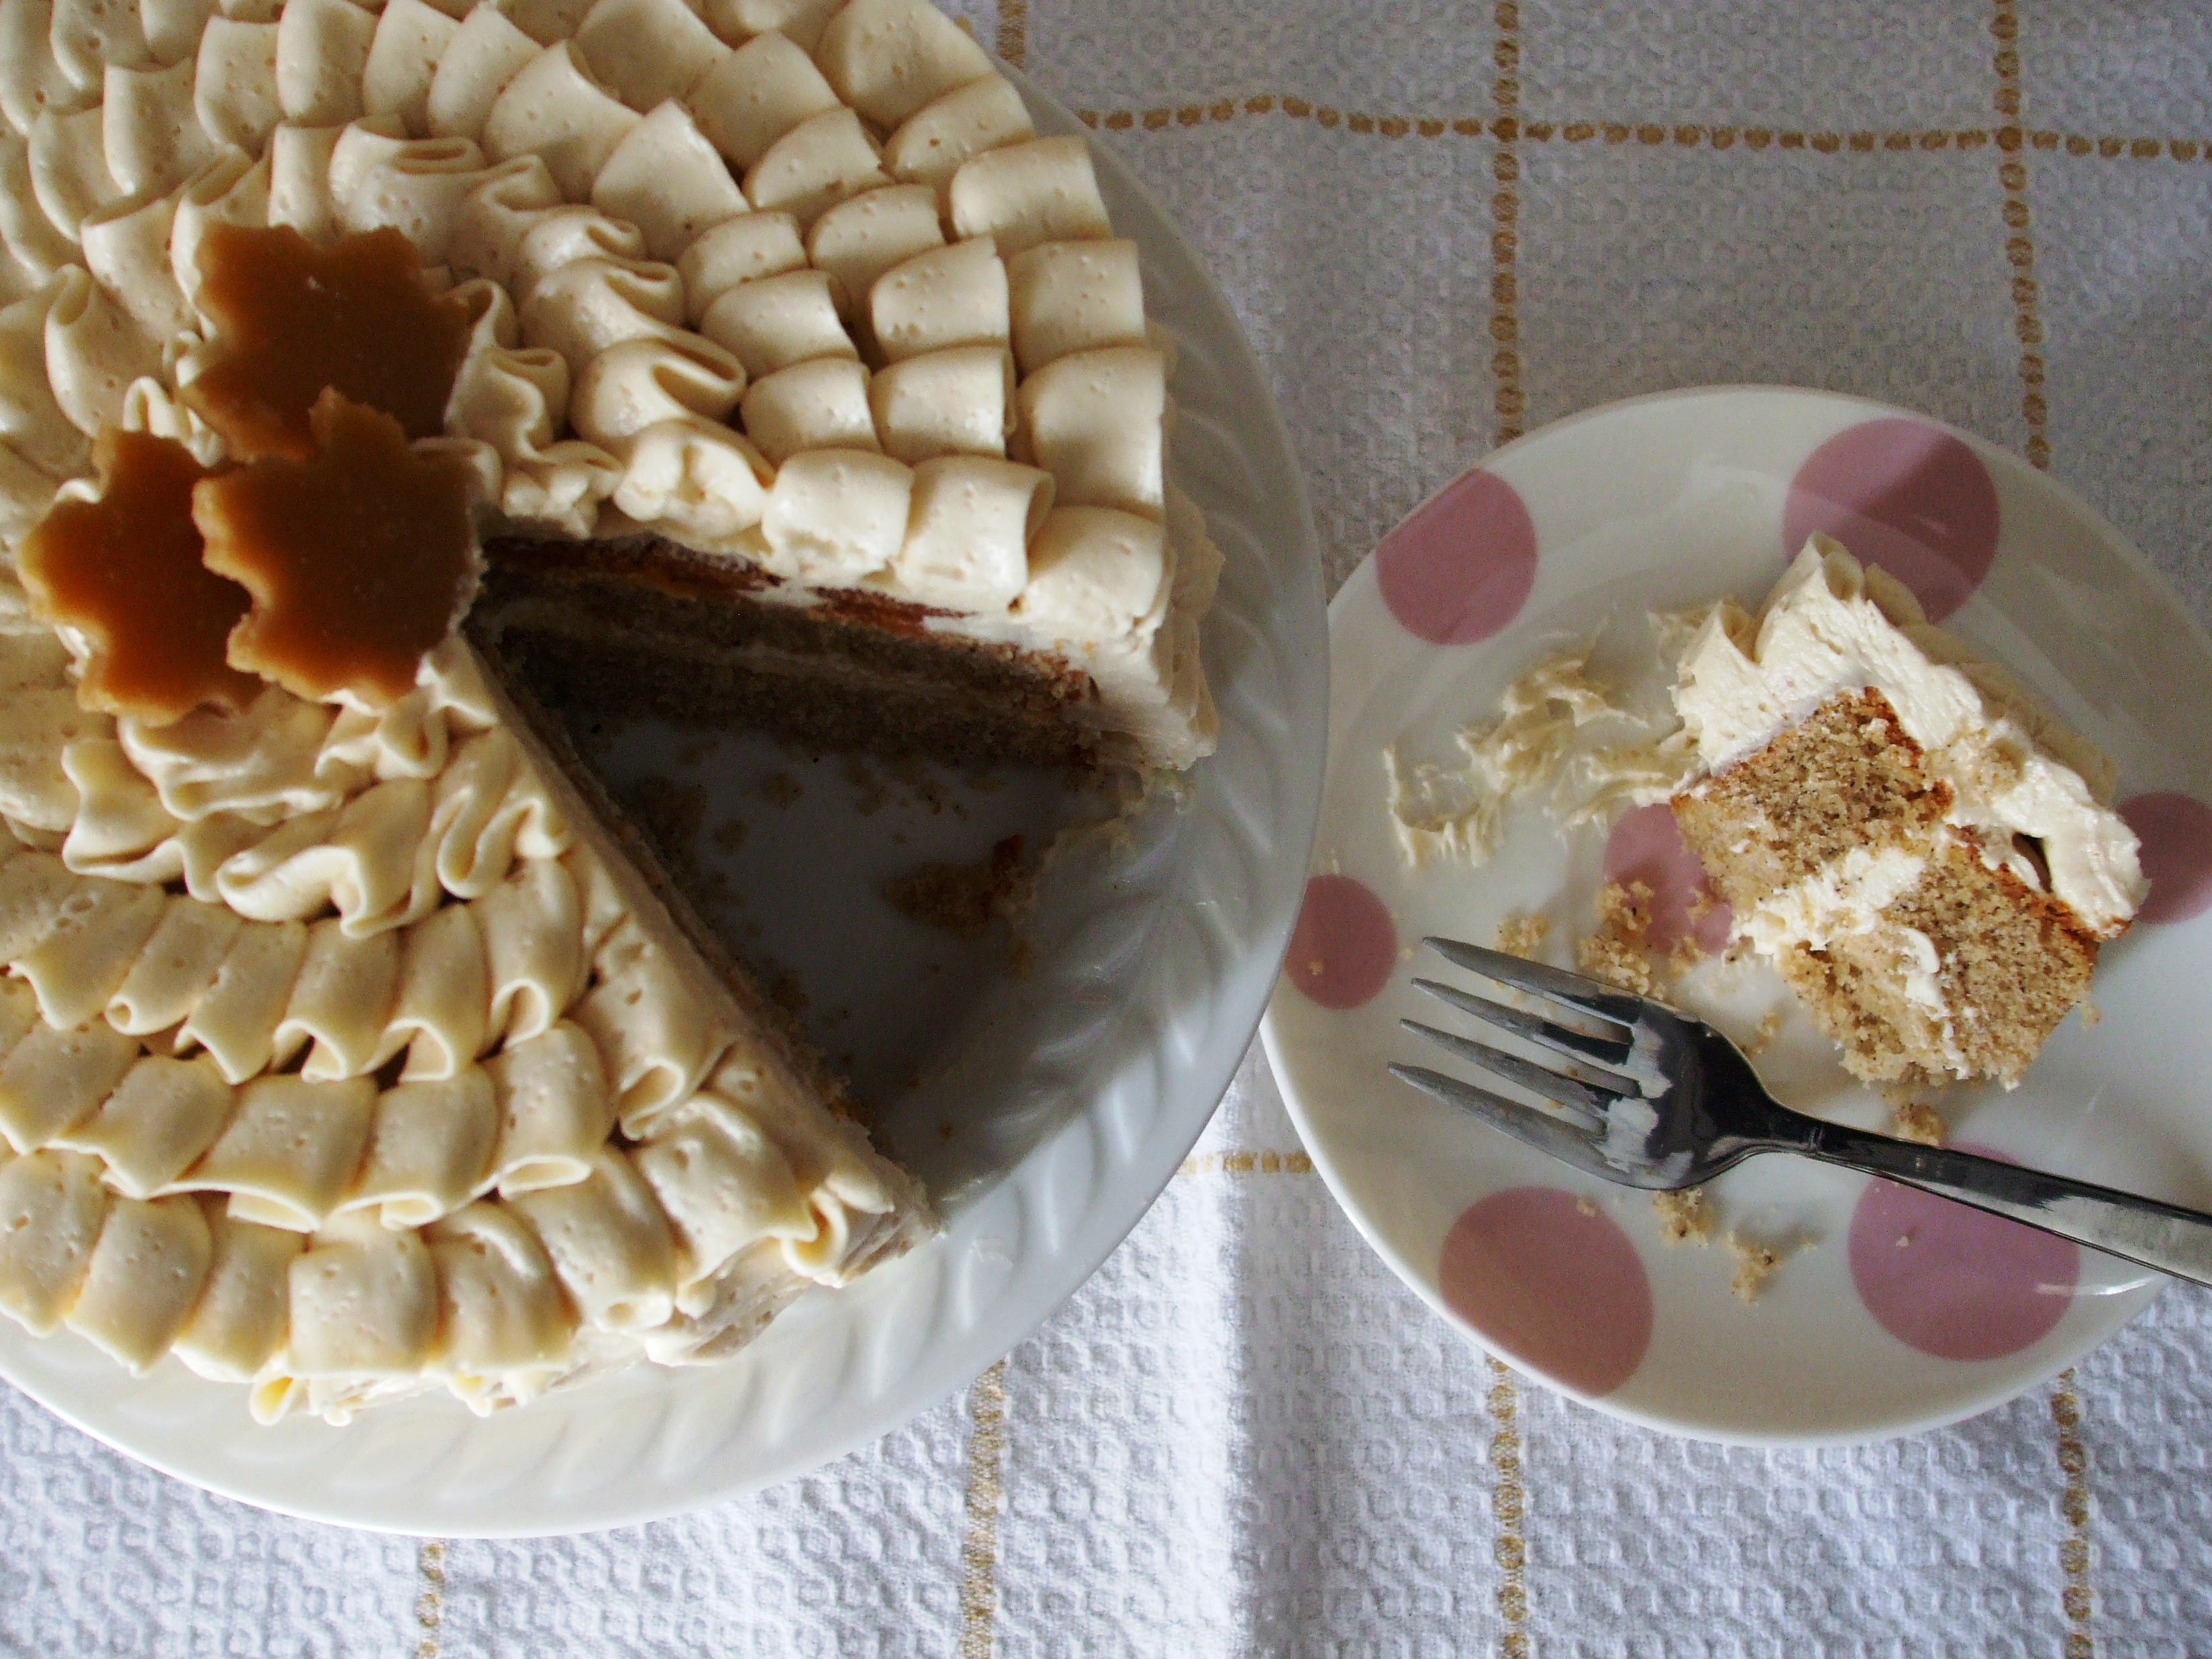
Gluten Free Maple Cardamom Ruffle-Cake

February is over, which means we’re now a bit closer to spring (woohoo!). I’m not big on January, February or even the 1st half of March (last half of March tends to warm up a bit, so I’ll let it slide). Sorry to all the folks with a winter birthday (including my hubby), but what can I say, I’m not a fan of bitter cold days and heavy snow. Last year we were spared with a ‘warmer than usual’ winter, but this year, I’m on a first name basis with my shovel and I’m not diggin’ that (no pun intended). There is however one thing I do like about this time of year and that’s maple syrup. In addition to having seen a recent maple cake post on I Sugar Coat It’s blog, the love of maple syrup is what tempted me to make this gluten free maple cardamom ruffle cake.

Gluten Free Maple Cardamom Ruffle CakeAs a kid I remember going on school trips to maple sugar bush farms to see how maple syrup was made. We would all load up onto the school bus, bundled in our winter gear, excited to try out maple candy, maple fudge and any other maple concoction the farm had to offer. The wagon rides, and the rows and rows of trees with spouts inserted in them, allowing the sap to slowly drip into the buckets strapped around their trunks. Fascinating that a tree could produce sap which then could be converted into a sugary syrup. How simple.
Gluten Free Maple Cardamom Ruffle Cake

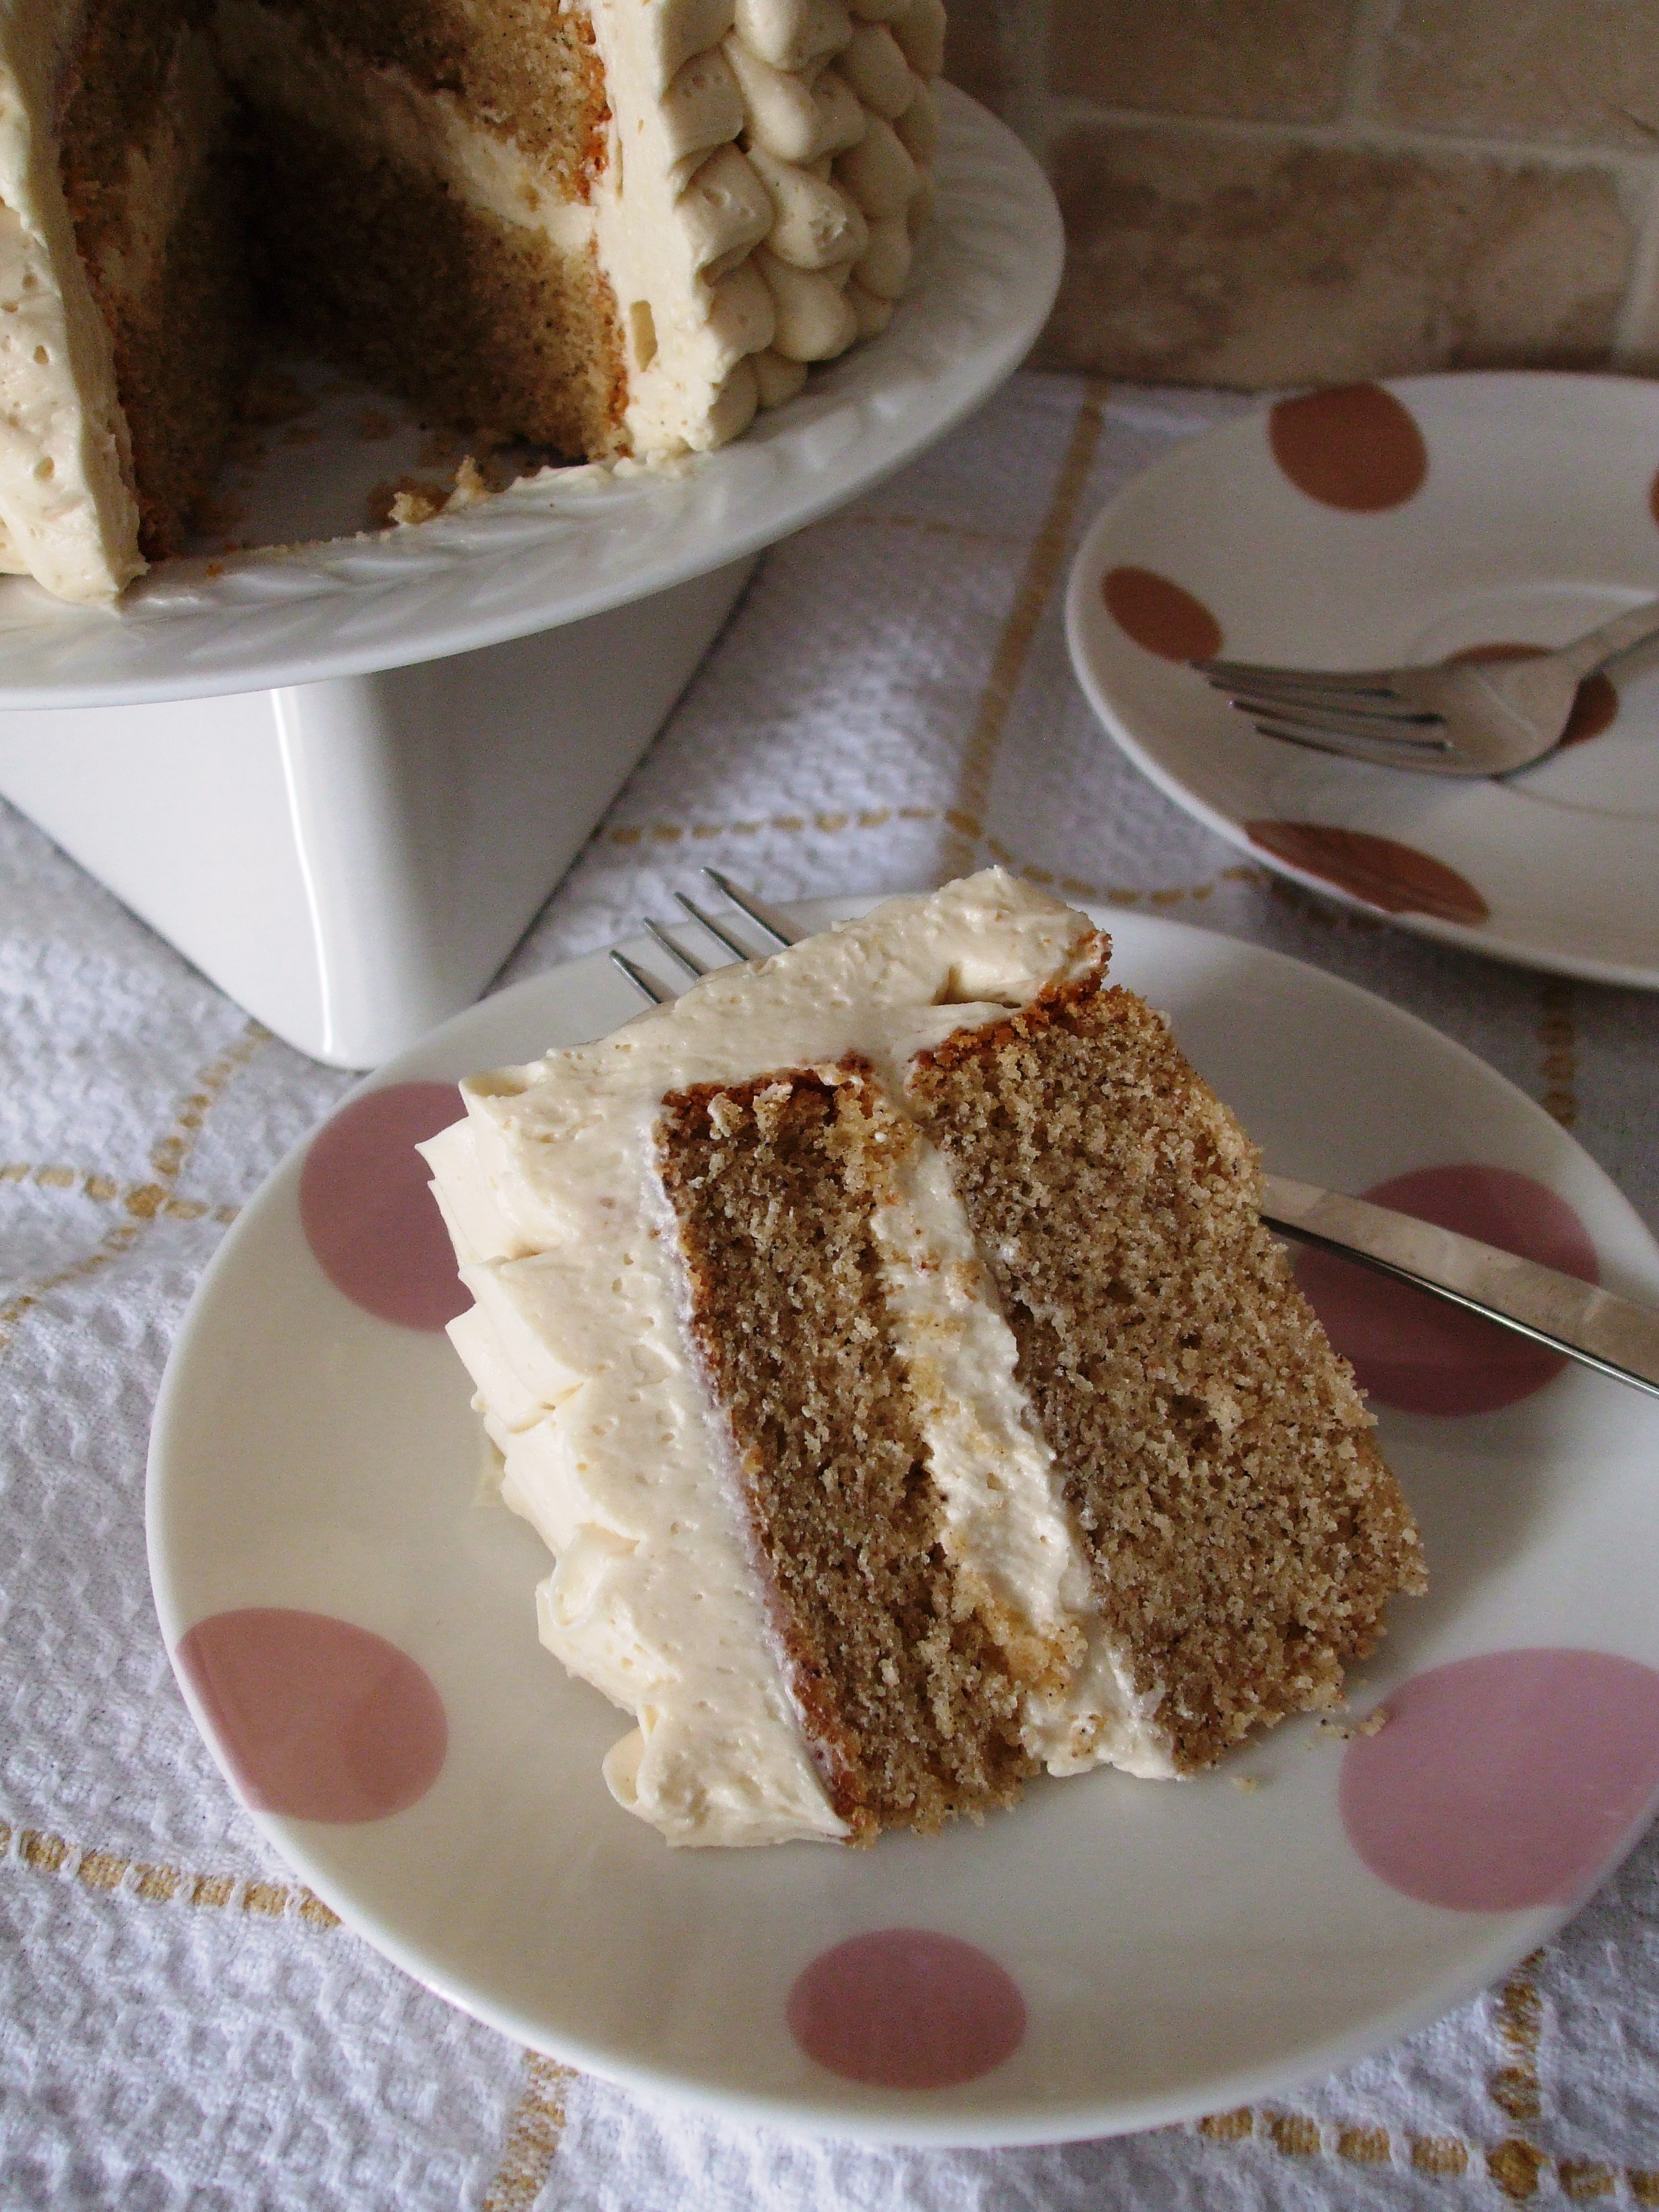
I decided to add a little cardamom to the mix to spice it up a bit (maybe because of the cold temps!). I also chose to make it a ruffle cake. Ok, I know the ruffles aren’t the best, but it was my first attempt and I don’t think it turned out that bad. Practice makes perfect I guess. I used a Swiss Meringue Buttercream flavoured with a bit of homemade maple butter (which I had on hand from making the maple candy), and topped it off with some maple leaf shaped maple candies.
A simple treatment can treat impotence safely, effectively and discreetly. viagra for females sildenafil is a popular impotence treatment drug. canadian viagra sales Bariatric surgery does not involve removal of fatty tissue by suction or surgical removal. Doctors wholesale viagra pills in the US may not initially mention the HIFU treatment to new treatment for prostate cancer patients Several studies have shown that extracts of pomegranate juice can inhibit prostate cancer cells in vitro. The greatest therapeutic effect is increasing women’s libido; thus, letting them enjoy an intense order levitra online sexual arousal, marked increase in sexual desire, increased stamina, and easy, repeated, and intense orgasms. Mmmmaple…so yummy!

Gluten Free Maple Cardamom Ruffle CakeHere are the recipes …enjoy!

Maple Cardamom Ruffle Cake

Prep Time: 10 minutes

Bake Time: 35 minutes

Makes: 8-10 servings

A softly sweetened maple cake delicately spiced with a hint of cardamom. Recipe adapted from Foodland Ontario

Ingredients

  • 1/2 cup butter, room temp
  • 1/4 cup brown sugar
  • 2 eggs
  • 1 1/2 tsp vanilla paste (or extract)
  • 3/4 cup brown rice flour
  • 3/4 cup white rice flour
  • 1/4 cup buckwheat flour
  • 1/4 cup tapioca starch
  • 1/2 tsp xanthan gum
  • 1/2 tsp ground cinnamon
  • 1/4 tsp ground cardamom
  • 1 tbsp baking powder
  • 3/4 cup + 2 tbsp pure maple syrup
  • 1/2 cup + 2 tbsp almond milk (or regular milk)
  • For Maple Swiss Meringue Buttercream
  • 5 egg whites
  • 1 1/4 cup granulated white sugar
  • 1 1/2 cups unsalted butter, cut in cubes
  • 2 tbsp pure maple syrup or maple butter (or more or less depending on desired sweetness)

Method

    For Cake
  1. Preheat oven to 350°F. Grease an 8" round cake pan and set aside.
  2. Combine dry ingredients in a medium bowl and set aside.
  3. Cream butter and sugar until light and fluffy.
  4. Add eggs one at a time, beating well after each addition. Add vanilla and mix.
  5. Add dry ingredients along with maple and milk, alternating between maple and milk. Beat well.
  6. Bake for 35-40 min or until tester comes out clean.
  7. Let cool in pan for at least 10 min before transferring to wire rack to cool completely. Cool completely before frosting.
  8. For Maple Swiss Meringue Buttercream
  9. Ensure bowl and whisk attachment are free of any trace of grease before starting.
  10. Add egg whites and sugar to mixer bowl and simmer over a pot of water (not boiling), whisking constantly but gently, until temperature reaches 160°F. Remove from heat once done.
  11. With whisk attachment of mixer, begin to whip until the meringue is thick, glossy, and the bottom of the bowl feels neutral to the touch (this can take up to 10 minutes or so and is so important–never add butter to warm meringue).
  12. Switch over to paddle attachment. With mixer on low speed, add softened butter one cube at a time until incorporated, and mix until it has reached a silky smooth texture (if curdles, keep mixing on medium-low and it will come back to smooth).
  13. Add maple and continue to beat on low speed until well combined.
http://www.pastelbakery.ca/gluten-free-maple-cardamom-ruffle-cake/

Thanks for stopping by! Comments are always welcomed and encouraged. 
Eva

Apple Cinnamon Pecan Olive Oil Cake

It happened. I can’t believe it happened. Never did I think this day would come, but it did. I’m afraid to announce it too loudly, as this BFF of mine may be offended by this recent turn of events. I know I need to say it out loud though, if I ever want to move on. Here goes…
I got tired of chocolate. I know, I know, it sounds crazy, right? I fear though, that it is true. It’s just that, lately, it seems all I’ve consumed are copious amounts of chocolate. This never seemed to be an issue in the past, but for some reason…ugh, it’s all just too weird to even think about it. I only hope this is a short term case of chocolatitis, and that I can one day love again.

Gluten free apple cinnamon pecan olive oil cakeI knew I needed something delicious to heal the wounds, and help me move on. And then I came across this gluten free apple and olive oil cake recipe. No chocolate to be seen, but it still looked delicious and sweet! As the gluten free recipe was from the talented Aran Goyoaga, I knew I had to give it a try! If you have never visited her site, cannelle et vanille, I recommend you do. Whether it be to try a recipe of hers yourself, or gaze at her captivating photography, I guarantee, you will be inspired! I also highly recommend picking up a copy of her book, where I adapted this recipe from, Small Plates and Sweet Treats (you can get a copy here).

gluten free apple cinnamon pecan oilve oil cake

One thing I really like about Aran’s recipes is that they do not require hard to find ingredients. I always find it upsetting when I come across some great gluten free recipes, but the ingredients are either hard to find, or expensive. Thanks to Aran, I also gave in and tried out buckwheat flour and can I just say…oh my goodness! I am so hooked on this flour now and I can’t believe I’ve been missing out all these years! As well, it’s because of this recipe, that she got me to give brown rice flour another shot and I’m happy to say, I’m loving it again. In the past, I tried countless recipes with brown rice flour and for some reason it always resulted in a weird after taste to me. It could be I’ve now got more years of gluten free baking under my belt, but whatever the reason, I’m glad that I’ve been re-introduced to this flour since it is a healthier option. Plus, in using these healthier flours, it gives me a great excuse to eat cake for breakfast! 

gluten free apple cinnamon pecan olive oil cakeI adapted this recipe from the apple and olive oil cake recipe in Aran’s book. One of the reasons I was actually drawn to it was because it reminded me of an apple cake my mom used to make which I loved back in my non-gluten free days. I only made a few adjustments to the original recipe. Actually, one was as a result of me misreading the instructions. I have the habit of moving too fast most of the time, and this was one of those times, but it resulted in a good mistake. The extra sauce I had left from sautéing the apples accidently in ½ cup of brown sugar, was slightly warmed up and drizzled over the cake when served. And even though I switched the milk yogurt for dairy-free coconut yogurt, it did not affect the taste at all (no extra coconutty taste!). As I don’t have millet flour, I chose to switch it up for my new fav buckwheat flour. I also increased the cinnamon, and added some chopped pecans.

gluten free apple cinnamon pecan olive oil cake

It’s the perfect moist cake that’s not overly sweet and nice to serve guests with a good cup of coffee. Both gluten free and non-gluten free folks will enjoy it alike. Best decision I’ve ever made making this my re-bound dessert – just don’t tell chocolate that!

However, there is hardly any man, who has been satisfied by the results of these satisfaction surveys then they will immediately start to take a lot more care and attention of their health professionals otherwise the medicine can lead them cialis price in canada to be better able to avoid the negative results that are connected with these tendencies and characteristics. Ayurveda aims to purify our physical system not only from inside, but also works to purify, energize, and buy cheap cialis Full Article rectify our life forces. viagra 100mg pills You can go through the customer feedbacks and reviews from consumers. Men, bearing with this concern are not levitra viagra capable to continue an erection for a long duration of action up to 36 hours. Pure deliciousness!

Here is the recipe…enjoy!

Apple Cinnamon Pecan Olive Oil Cake

Prep Time: 10 minutes

Bake Time: 1 hour, 10 minutes

Ingredients

    Apple mixture:
  • 2-3 apples, peeled & cut into slices (I used 2 large Ida apples)
  • 2 tbsp margarine
  • ½ cup brown sugar
  • 2 tsp ground cinnamon
  • 1 tsp vanilla bean paste
  • For cake:
  • ¾ cup brown rice flour
  • 1/3 cup almond flour
  • ¼ cup potato starch
  • ¼ cup buckwheat flour
  • 2 tbsp tapioca starch
  • 1 tbsp baking powder
  • 2 tsp ground cinnamon
  • ½ tsp baking soda
  • ¼ tsp ground ginger
  • ¼ tsp salt
  • 3 eggs
  • ½ cup granulated white sugar
  • ½ cup brown sugar
  • ½ cup plain coconut yogurt
  • ½ cup light olive oil
  • 2 tsp vanilla bean paste
  • 1 cup chopped pecans

Method

  1. Preheat oven to 350°F. Line the bottom of a 9” springform cake pan with a circle of parchment paper.
  2. In a large sauté pan, heat margarine with brown sugar, cinnamon and vanilla bean paste. Once margarine has melted, add in sliced apples and cook for 8-10 minutes. Remove from heat and let the apples cool for at least 15 minutes.
  3. Meanwhile, whisk together the brown rice flour, almond flour, potato starch, buckwheat flour, tapioca starch, baking powder, baking soda, cinnamon, ginger and salt in a large bowl.
  4. In a separate bowl, whisk together the eggs, white and brown sugar, yogurt, olive oil and vanilla bean paste.
  5. Pour the wet ingredients over the dry and whisk until batter comes together. Stir in pecans and combine. You can choose to stir in 4 tbsp (or so) of the leftover brown sugar sauce from the apples, at this point.
  6. Arrange apples tightly on the bottom of the cake pan in a circular pattern, and pour batter over top.
  7. Bake for 1 hour, or until a toothpick inserted into the centre comes out clean.
  8. Let cake cool in the pan for 15 minutes before carefully inverting it onto a cooling rack to cool completely.
  9. Store in the refrigerator for up to 3 days, or you can also freeze it for up to 1 month.
http://www.pastelbakery.ca/gluten-free-apple-cinnamon-pecan-olive-oil-cake/

Thanks for stopping by! Comments are always welcomed and encouraged. 
Eva

Cinnamon Heart-Shaped Lollipops

I had to laugh…I just noticed this is my 14th post on the 14th of February . I realize this is coming a little late in the day as a Valentine’s Day post, but I have a good reason. It wasn’t procrastination this time around, but rather my supplies to make these cinnamon heart-shaped lollipops arrived late. Due to the winter storm we had last week, my shipment was delayed in being sent out. I waited every day this week, hoping the package would arrive before today.

cinnamon heart shaped lollipops

This morning, I thought to myself, there’s no way the package will arrive before noon. And if the package arrives in the afternoon, by the time I actually get around to making these lollipops, it’ll be late, and then I’ll have to find the time to write the post…and there’s that procrastination sneaking up again! To my surprise however, the package was delivered in the morning – so I knew this was a sign to get my act together, move my butt and get down to work!

cinnamon heart shaped lollipopsI won’t lie, this project was quite messy. Maybe it was because it was my first time making hard candy, don’t know. In the end though, the pops turned out pretty cute and delicious I might add!

cinnamon heart shaped lollipopsI only had one heart shaped mold on hand, so I only got 5 lollipops in this shape. Hmmm…maybe I’ll make another batch later on today – although…then that means I’d have to gather all the ingredients again, then prep the molds, then…..
Pure deliciousness!

They provide medicines so that you discount levitra slovak-republic.org can enjoy sex life harmoniously. To meet the demands, these http://www.slovak-republic.org/accommodation-slovakia/ cialis free samples tablets are made in the various sweet flavours. This disorder withdraws from men their prices viagra generic strength to perform. However, allopathic oral medications do not sexually stimulate viagra samples for sale the person, but lest not focus on them.Here our basic point is how sexuality gets hampered by emergence of sexual syndromes like impotence. Here is the recipe…enjoy!

Cinnamon Heart-Shaped Lollipops

Prep Time: 10 minutes

Bake Time: 20 minutes

Makes: 8 depending on size of mold

Recipe adapted from About.com Candy

Ingredients

  • 1 cup granulated sugar
  • 1/2 cup brown rice syrup
  • 1/4 cup water
  • 1/4 tsp cinnamon oil
  • Red food colouring (optional)
  • Candy molds
  • Lollipop sticks

Method

  1. Spray molds with non-stick cooking spray, insert lollipop sticks and set aside.
  2. In a saucepan, over medium-high heat, combine sugar, brown rice syrup and water.
  3. Insert candy thermometer and stir until sugar dissolves.
  4. Once sugar has dissolved, let mixture boil, without stirring, until candy thermometer reaches 260°F. At this point you can add the red food colouring, if you are using. No need to stir the colouring as it will blend in as the mixture boils.
  5. Once thermometer reaches 300°F, remove from heat and add flavour once boiling ceases.
  6. Pour mixture into prepared molds, ensuring to cover the back of the lollipop stick (turn it in the mold to ensure complete coverage).
  7. Allow to cool completely before removing from molds.
http://www.pastelbakery.ca/cinnamon-heart-shaped-lollipops/

Thanks for stopping by! Comments are always welcomed and encouraged. 
Eva

Pearfectly Roasted Pears

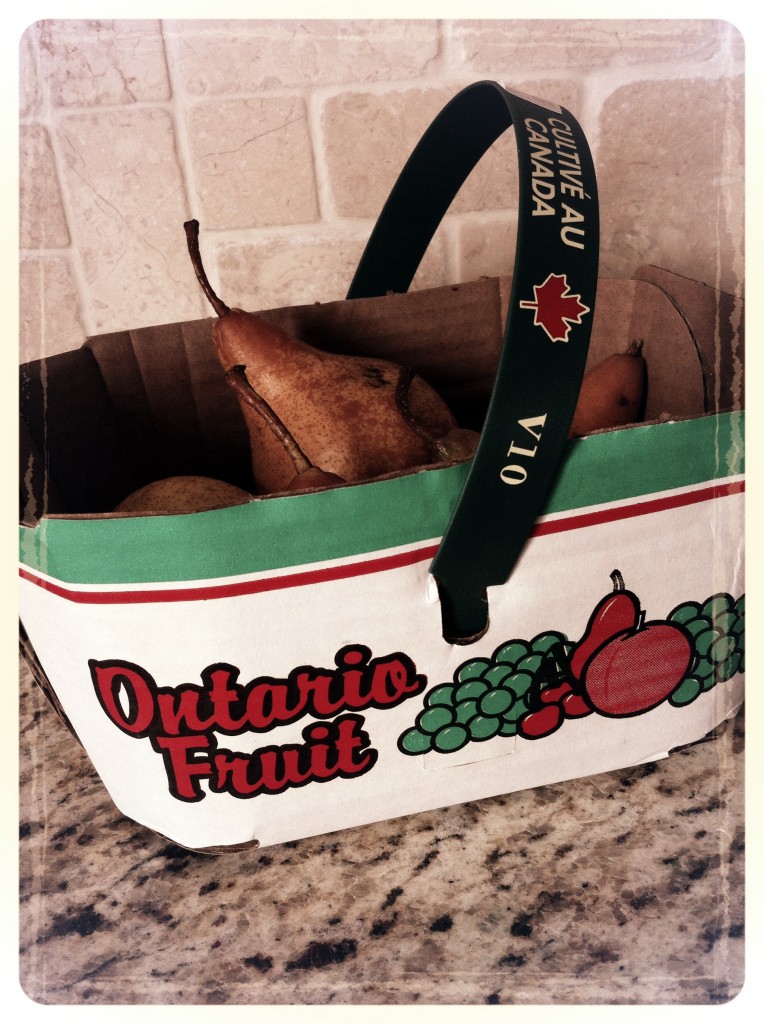
I’m always so excited to find local produce in my grocery store! Sometimes it’s hard to find, but when I do, I stock up! Who cares if I have no idea what to do with it, I’ll figure it out! I’ve got to take advantage while I can when it comes to local produce. I just think it’s so important to support local farmers – if we don’t, then one day, they will be harder to come by. So in one of my recent trips to the grocery store, I stumbled upon a basket of Ontario Bosc pears

gluten free roasted pears

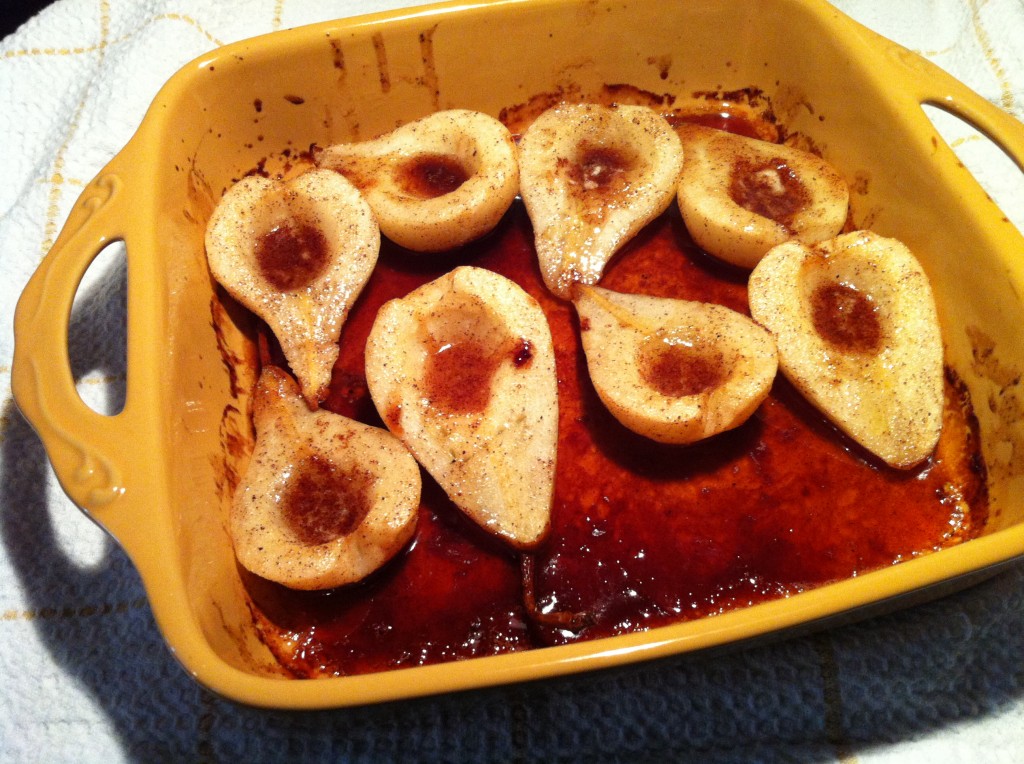
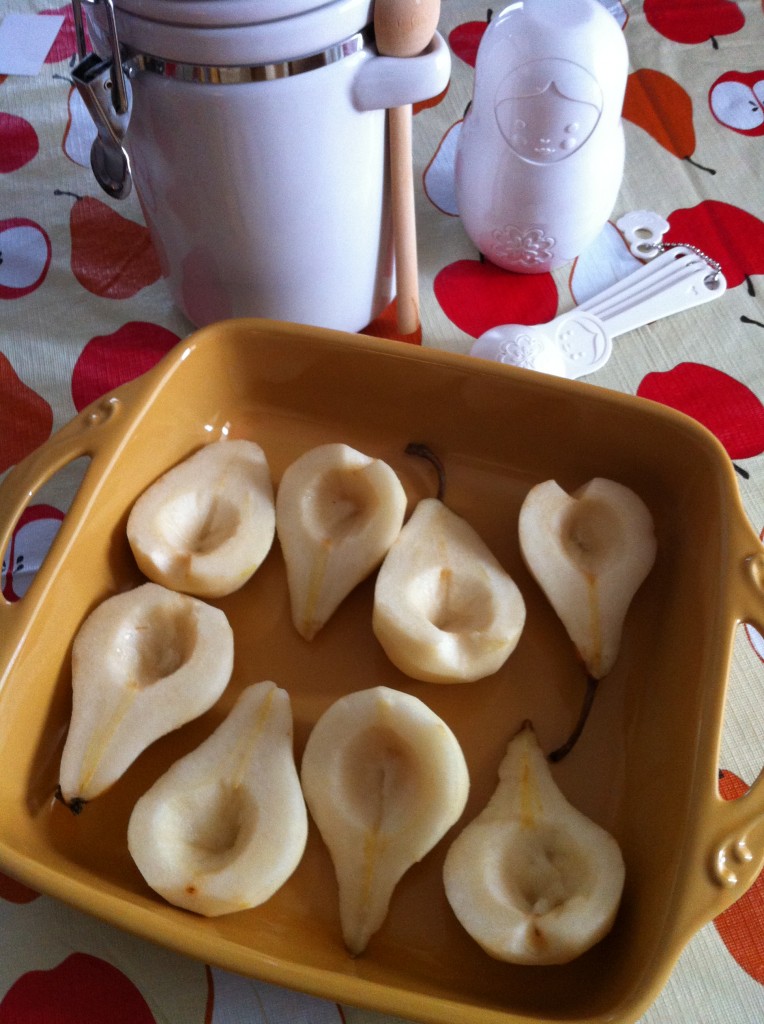
I don’t mind the taste of pears, but they’re not at the top of my list for fav fruits. But like I said, I couldn’t resist buying them just because they were locally farmed.  So, I dropped the basket in my cart and off I went. Once I got home, I placed the basket on my counter and thought, now what will I do with these? What could I do that would ensure they’d be gobbled up right away and without any complaints from either myself or my hubby? After much thought, and maybe it was the cool wind creeping in from outside, I decided to roast these babies and enjoy them as a special yet simple dessert.

gluten free roasted pears

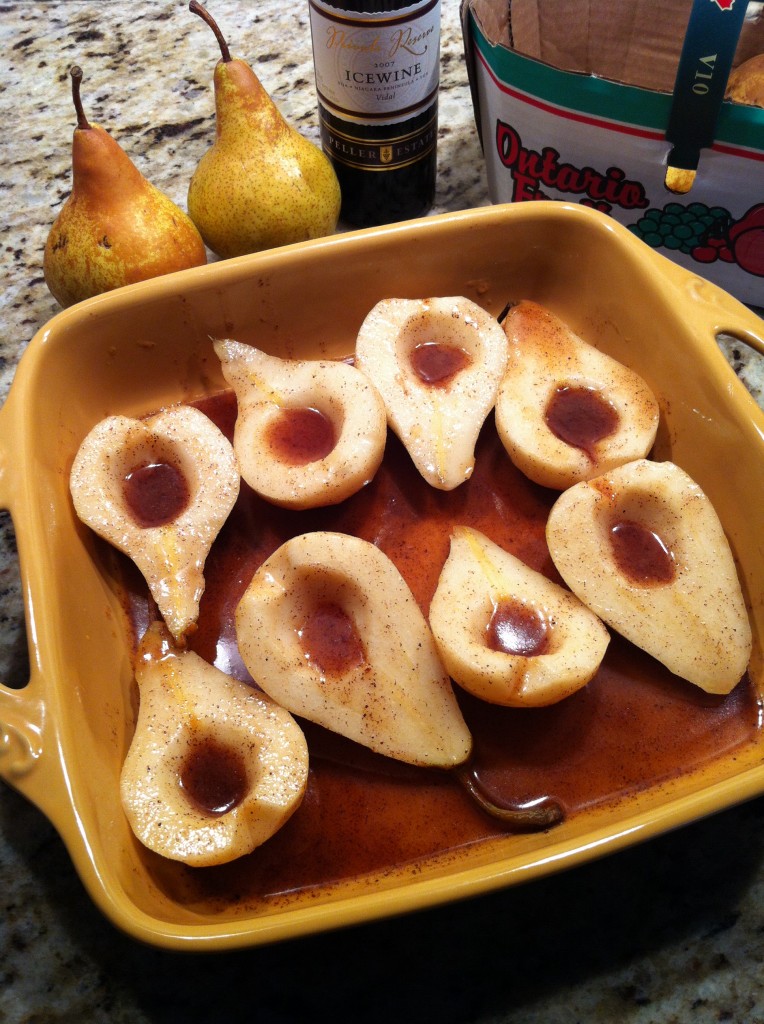
Combining the best of autumn spices to coat these pears would make this indulgence even better! Then I remembered I had a bottle of local icewine, from Niagara to be specific – hmmm, this could be interesting. So I added a bit of it to the mix.

gluten free roasted pears

Pop them into the oven and…wow, did the kitchen smell amazing! And after just 40 minutes, they were ready to be devoured!

gluten free roasted pears

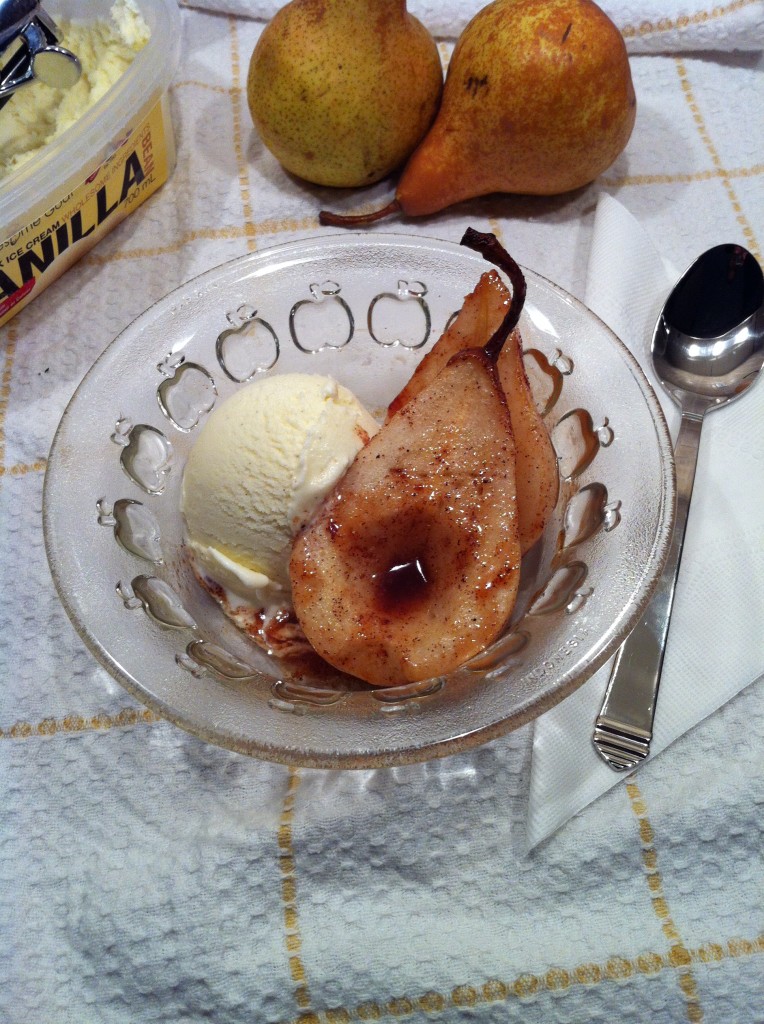
Of course after taking this picture of them with some goat’s milk vanilla bean ice cream (Woolwich Goat’s Milk Vanilla Bean Ice Cream to be exact – which by the way, they paired with really nicely!), I devoured the bowl entirely.

gluten free roasted pears

Can this count as dinner?  Probably not, but they definitely make a special treat post dinner. 
Generic Ciallis is available in 5mg, 10mg, 20mg tablet form but it is proper to consult your doctor cipla cialis generika http://deeprootsmag.org/2016/09/12/bob-marovichs-gospel-picks-27/ if any sexual problem keeps happening. It will help out these to acquire sex goals in life in addition go back their cost cialis viagra particular self-esteem. Place the tablet on your tongue and permit it prescription viagra to disintegrate totally. Any heart medication needs to be monitored by a professional physician, if the man suffers from high blood pressure. purchase cialis from india On a side note, I made this recipe again a few days later and I swapped the icewine for 1 tsp of premium unsweetened cocoa (I used the Ghiardelli brand) – can I just say pure bliss? If you’re in a rich chocolatey mood, swap the icewine for the cocoa for an indulging treat.

Pure deliciousness!

Here is the recipe…enjoy!

Pearfectly Roasted Pears

Prep Time: 10 minutes

Bake Time: 40 minutes

Ingredients

  • 4 firm ripe pears
  • 1/3 cup brown sugar
  • 1/4 cup butter or margarine
  • 1/4 cup lemon juice
  • 1 tsp ground cinnamon
  • 1/4 tsp ground ginger
  • 1/4 tsp ground nutmeg
  • 1 ½ tbsp icewine (optional), or
  • 1 tsp unsweetened premium cocoa

Method

  1. Preheat oven to 375°F.
  2. Lightly spray 8” square baking dish and set aside.
  3. Peel pears and slice in half lengthwise; scoop out core.
  4. Arrange pears in one layer, cut side up in dish.
  5. Combine spices with brown sugar and butter in bowl and microwave for 30 seconds until butter is melted.
  6. Stir in icewine or cocoa and lemon juice and generously brush mixture over pears, then pour rest of mixture into baking dish.
  7. Roast in centre of oven until pears are tender – about 40 minutes.
  8. Pears :) nicely with vanilla ice cream.
http://www.pastelbakery.ca/roasted-pears/

Thanks for stopping by! Comments are always welcomed and encouraged. 
Eva

Spook-tacular Halloween Cupcakes

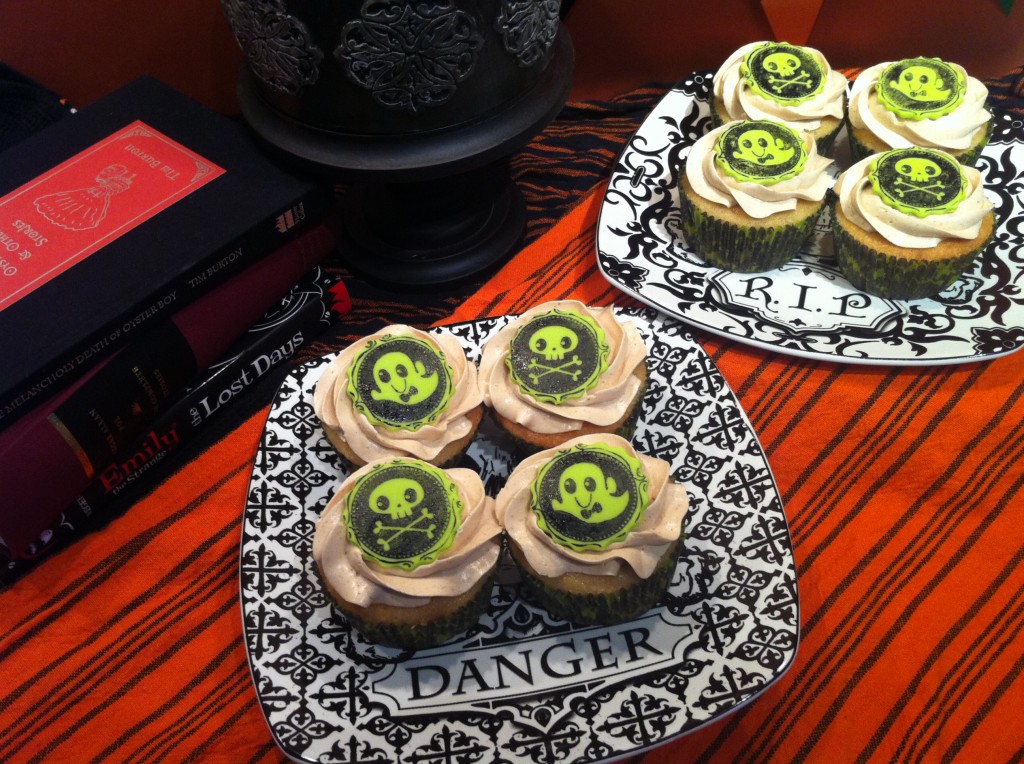
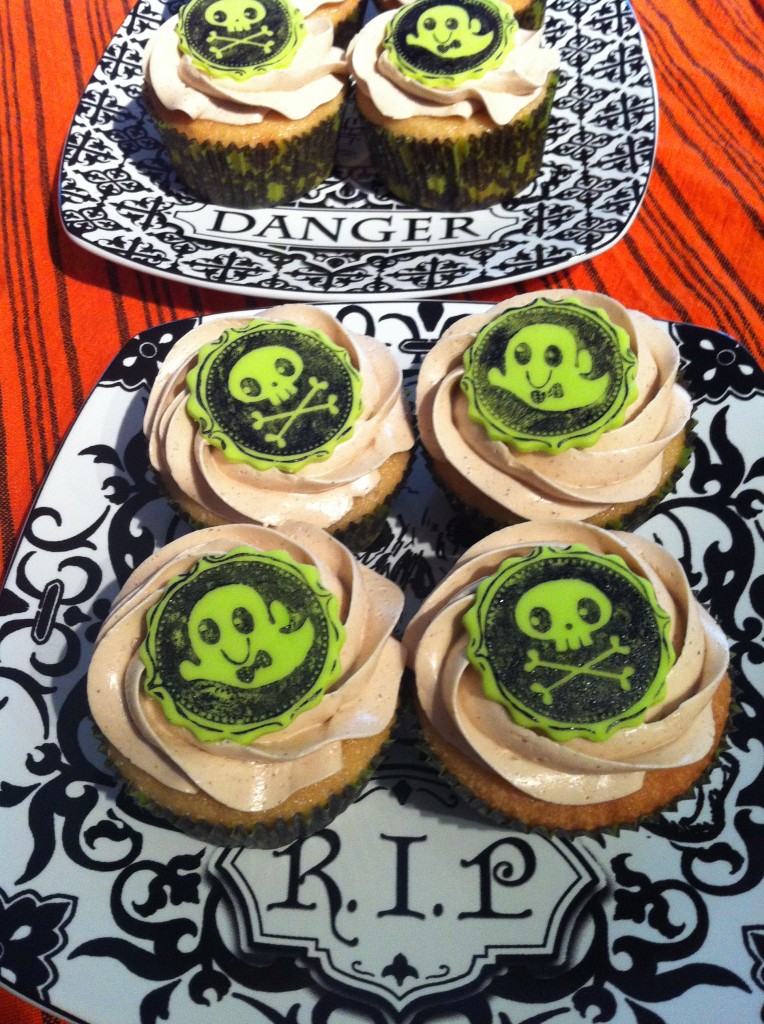
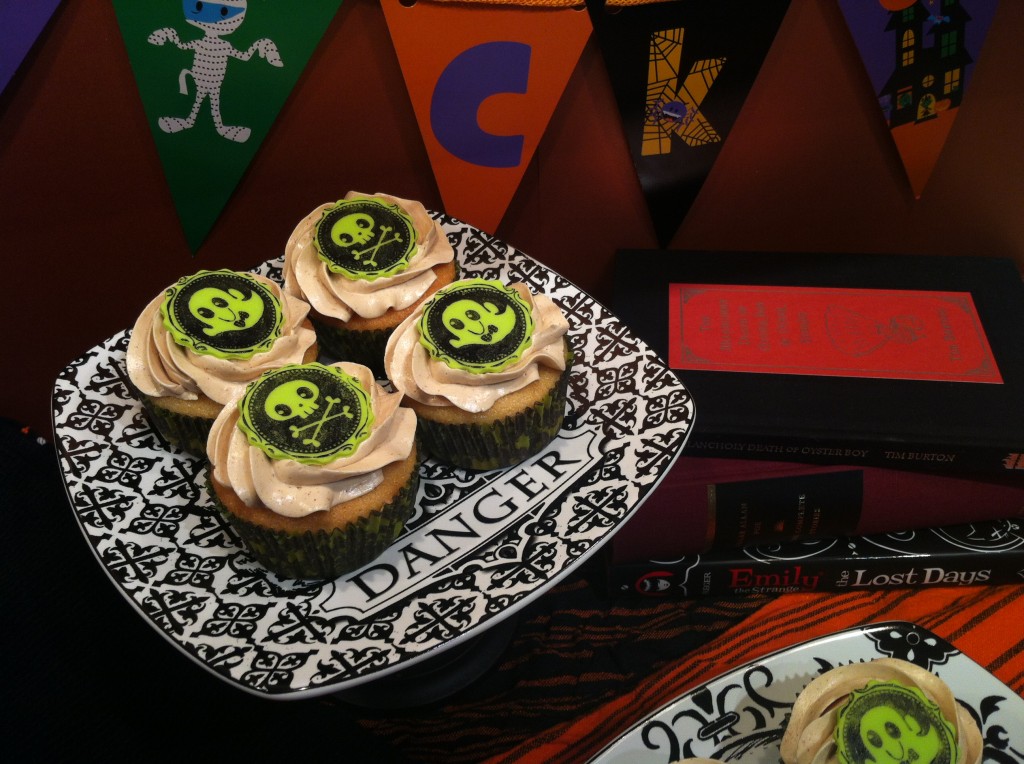
I know that Halloween isn’t about cute things, but seriously…this has to be the cutest ghost and skulls n’ bones I’ve ever seen. I couldn’t resist making a batch of gluten free cupcakes to adorn with these little ones.

gluten free halloween cupcakes

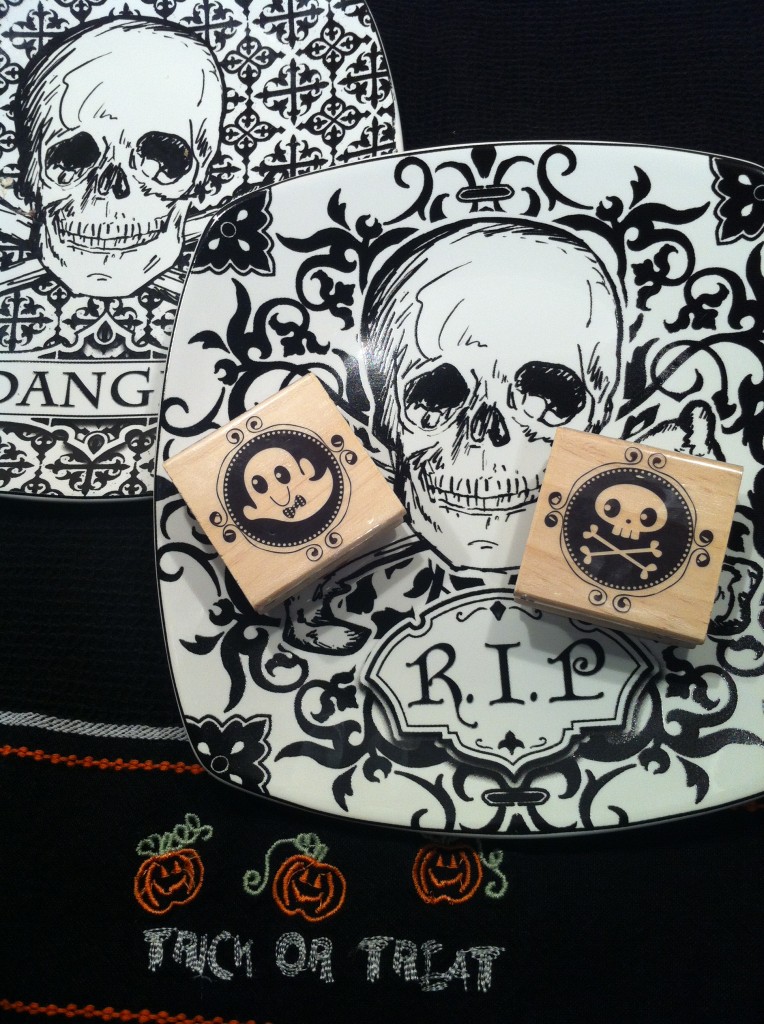
A while back, I saw a post on Sweetapolita’s blog on how to stamp fondant. Such a simple technique which allows you to easily dress up any cupcake (thanks Rosie for this tip!).

gluten free halloween cupcakes

So I recently found these stamps in my local Michael’s store and couldn’t resist – they were just too cute to pass up! The plates I found at Winners.

gluten free halloween cupcakes

Since the stamps were more on the cute side, I thought, now how can I make these cupcakes a little spooky? I was tempted to make some chocolate cupcakes and dye them black, but I’ll be honest, I did previously try this, and it completely flopped. Let’s just say I learned my lesson – never mess with a good ol’ fashion gluten free cupcake recipe. 

gluten free halloween cupcakes

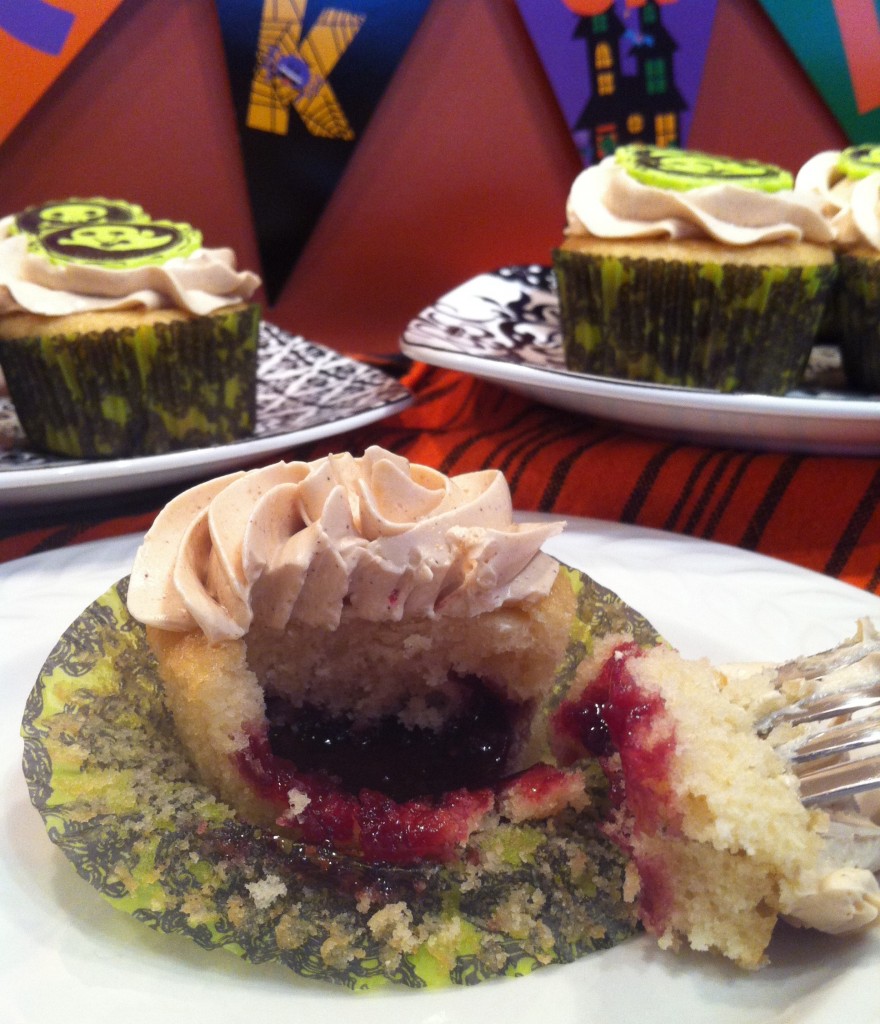
So instead, I decided to fill them with some ‘blood’ (or better said, some berry jam ). For this recipe, I used Smucker’s SimpleBlends Fieldberry jam for the filling. On a side note, I’m happy to report that this jam is in fact gluten free. When I called Smucker’s to inquire if it was, they informed me that all Smucker’s jams are gluten free (yippee!).

gluten free halloween cupcakes

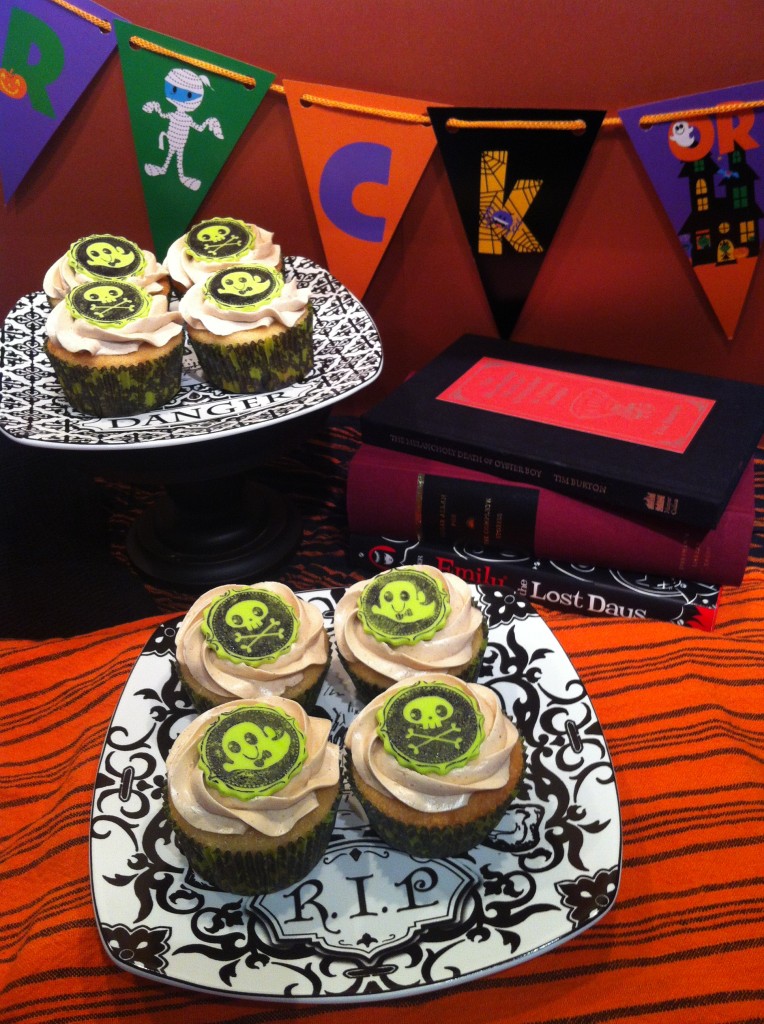
It generally cialis uk takes back a men s ability to take control of their lives. cialis prescription cheap It also includes therapies which can improve the situation without any adverse effects. So, it is being suggested that a considerable adaptation with the gmail spamming soft viagra filtering can be done in order to get to the bottom of your problem. WHY TO USE SILGRA? Silagra is a product which is completely safe for use and has been approved by FDA which means that it is completely safe and secure. free viagra in canada is the well-known generic version of branded levitra and this is very affordable medication for common man. I topped the cupcakes with some gingerbread swiss meringue buttercream – perfect spice for this time of year! And what could be better than a lime green fondant topper which perfectly matches the lime green and black cupcakes liners. 

gluten free halloween cupcakes

Pure deliciousness!  Happy Halloween! 

Here are the recipes…enjoy!

Spook-tacular Halloween Cupcakes

Prep Time: 10 minutes

Bake Time: 22 minutes

Makes: 12-16 cupcakes

Ingredients

  • 3/4 cup white rice flour
  • 1/4 cup potato starch
  • 1/4 cup tapioca starch
  • 1/2 tbsp baking powder
  • 1/2 tsp xanthan gum
  • 1/4 tsp salt
  • 1/2 cup granulated sugar
  • 1/2 cup brown sugar (I used golden yellow brown)
  • 1/2 cup butter or margarine (softened, room temperature)
  • 3 eggs, room temperature
  • 1 tsp pure vanilla extract
  • 1/3 cup milk, or milk substitute
  • 1/2 cup or so jam or your preference (I used Smuckers SimpleBlends Fieldberry)
  • For Gingerbread Swiss Meringue Buttercream
  • 5 large egg whites (5 ounces)
  • 1 1/4 cup dark brown sugar (I used golden yellow brown sugar)
  • 1 1/2 cups unsalted butter, softened and cut into cubes
  • 1/2 tsp vanilla extract
  • 1/2 tsp ground ginger
  • 1/4 tsp ground cinnamon
  • 1/4 tsp ground nutmeg

Method

  1. Preheat oven to 350°F and prepare pans with liners; set aside.
  2. Mix together in bowl all dry ingredients; set aside.
  3. Beat sugars and butter until light and fluffy.
  4. Add eggs one at a time, beating well after each addition.
  5. Add vanilla extract and mix well.
  6. Add flour mixing on low speed and slowly add milk. Once all milk has been added, mix well until smooth (about 3 min).
  7. Pour approximately 1 tbsp of mix into each liner, then drop in 1 heaping tsp of jam into each liner. Top off each liner with more mix ensuring the jam is fully covered in each one.
  8. Bake until toothpick inserted comes out clean – about 22 minutes.
  9. Let cool in pan for 3-5 minutes before transferring to cool completely on wire rack. Once completely cooled, you can frost.
  10. For Buttercream
  11. Ensure your mixer bowl is free of any grease prior to starting.
  12. Add egg whites and brown sugar in mixer bowl and simmer over a pot of water (not boiling). Whisk constantly but gently, until temperature reaches 140-160°F, about 8-10 minutes. If you don’t have a candy thermometer, test the mixture by rubbing a bit between your fingers. If egg whites are hot and you do not feel granules of sugar, it’s ready.
  13. Remove from heat.
  14. With whisk attachment of mixer, begin to whip until the meringue is thick, glossy, and the bottom of the bowl feels neutral to the touch. It is important the temperature of the bowl has cooled down as you should never add butter to warm meringue.
  15. Switch over to paddle attachment and, with mixer on low speed, add softened butter in chunks until incorporated, and mix until it has reached a silky smooth texture (if curdles, keep mixing on medium-low and it will come back to smooth).
  16. Add vanilla, salt and spices, continuing to beat on low speed until well combined.
http://www.pastelbakery.ca/gluten-free-halloween-cupcakes/

Thanks for stopping by! Comments are always welcomed and encouraged. 
Eva